BUGGY 2.0 - CAMPER EDITION
Transforming the iconic off-roading “Buggy” into a camping focused build.

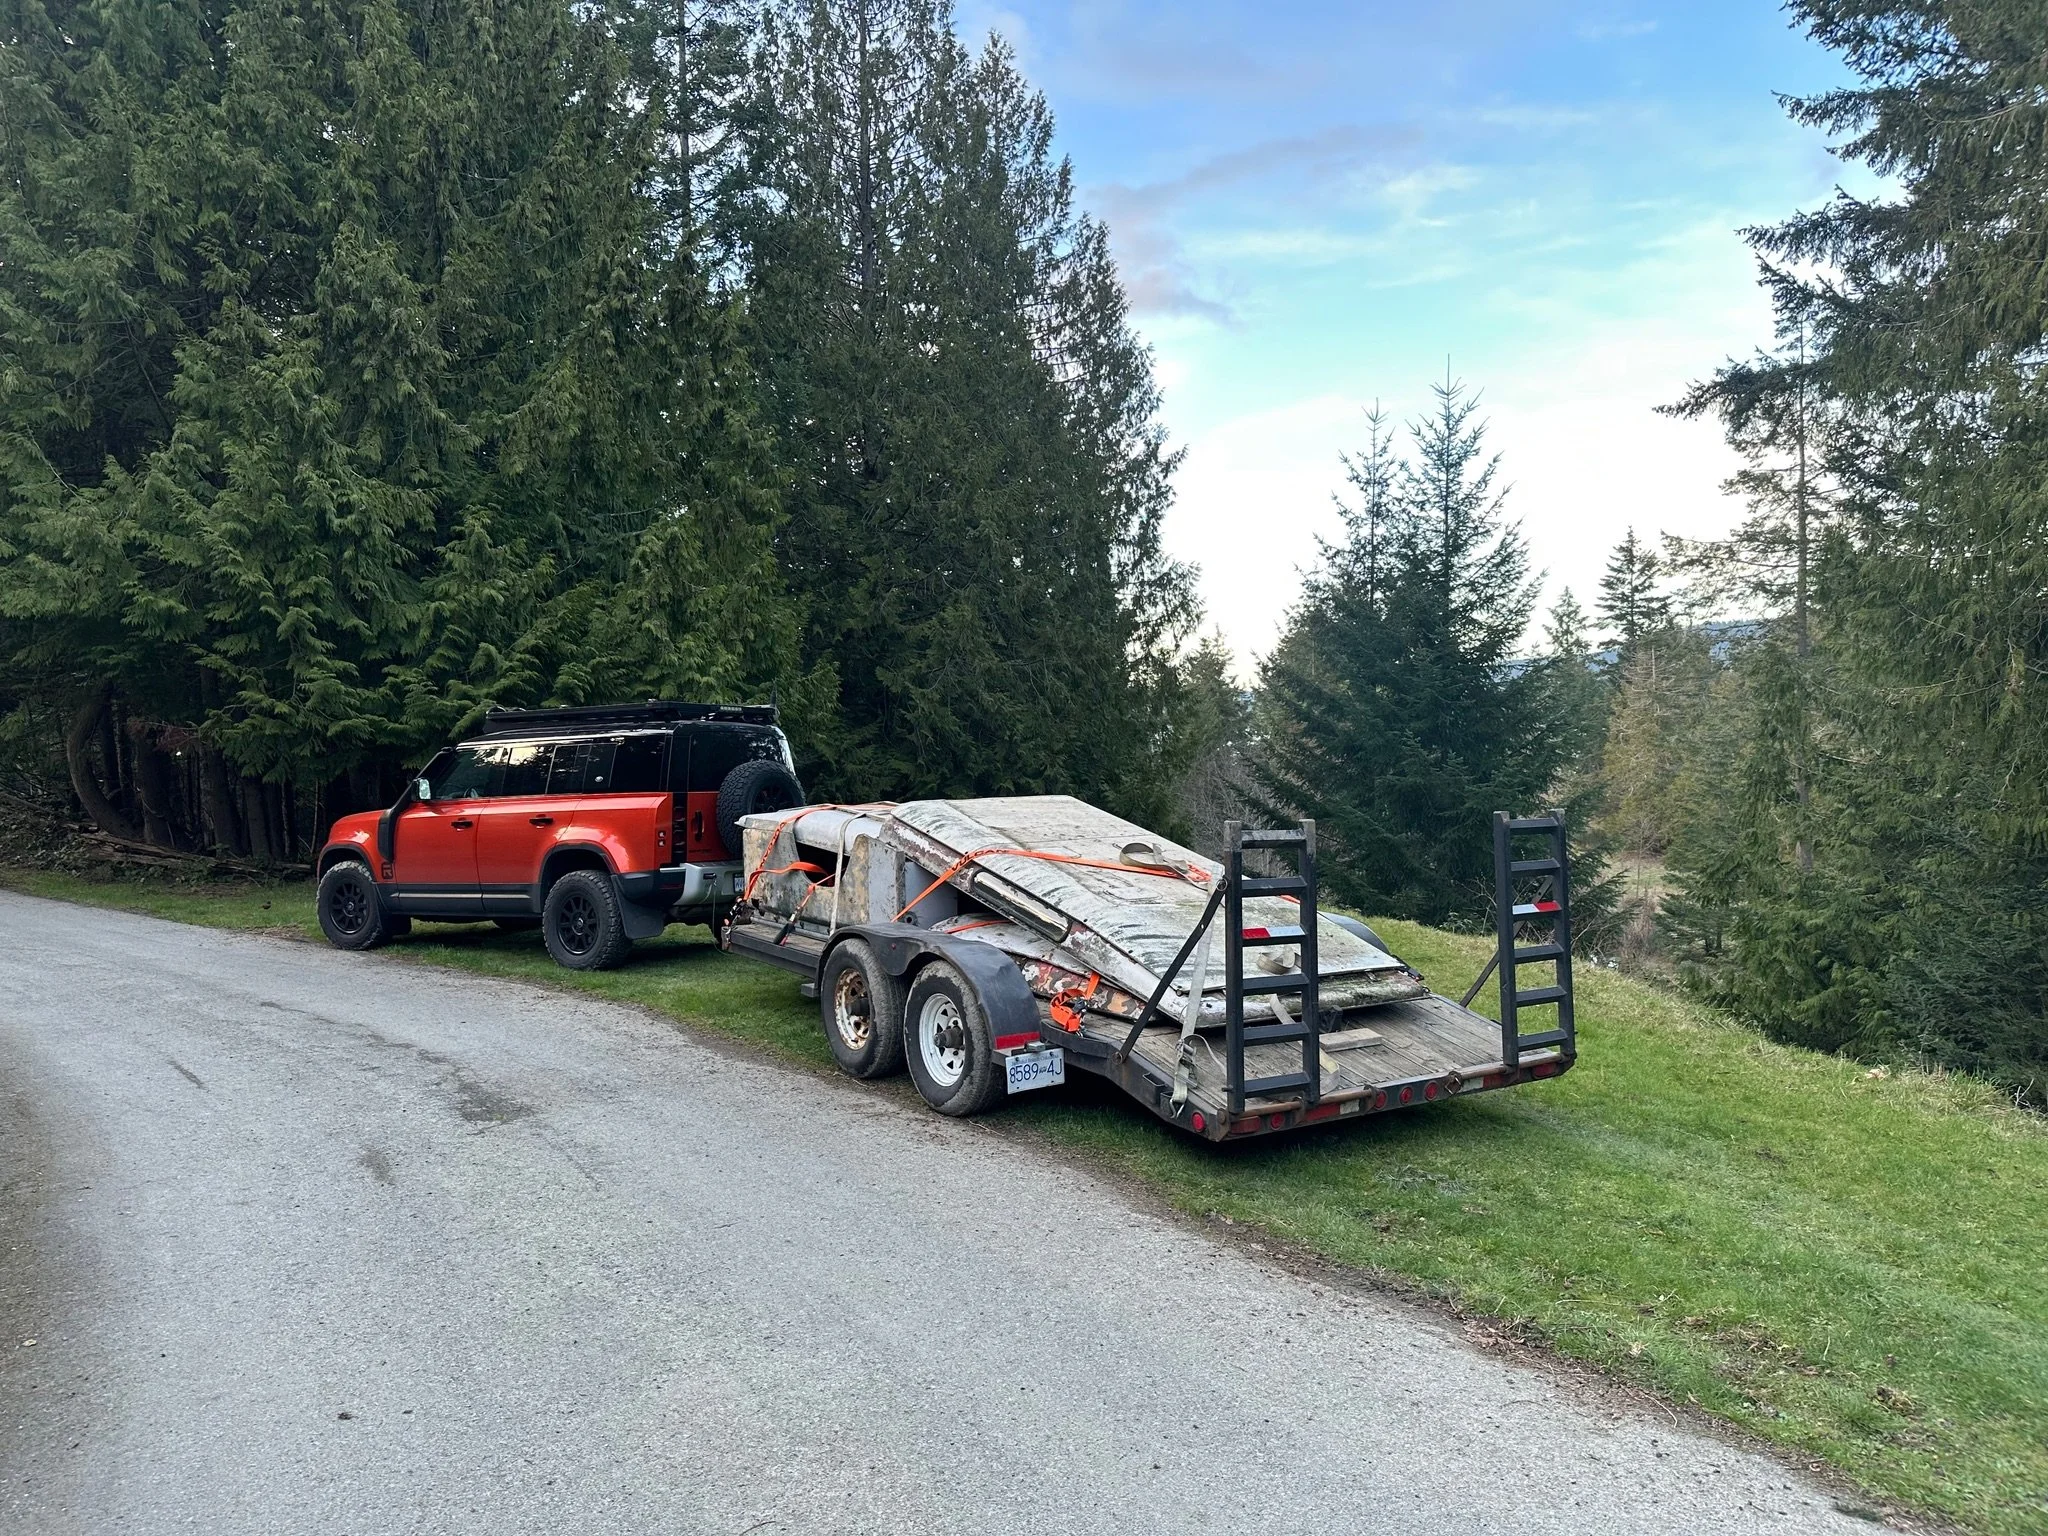
I’ve done a lot of camping in various vehicle set-up’s, but things got real when a group of friends and I committed to a road trip to the top of the world, Tuktoyuktuk and the Arctic Ocean. Soon, the ferries were booked and the date was set, August 23rd, failure was not an option! My wife and I would be on the road camping for three weeks! I knew I could rough it for a week, but three weeks would be a serious challenge to make it enjoyable and comfortable. One of our group made a long term commitment to camping and bought a new Tacoma, installed a new Wedge camper and a bunch of new gear. That helped push for some big decisions and I knew that the only way this was going to work was to build a proper sleeping setup in one of my existing Land Rover’s.
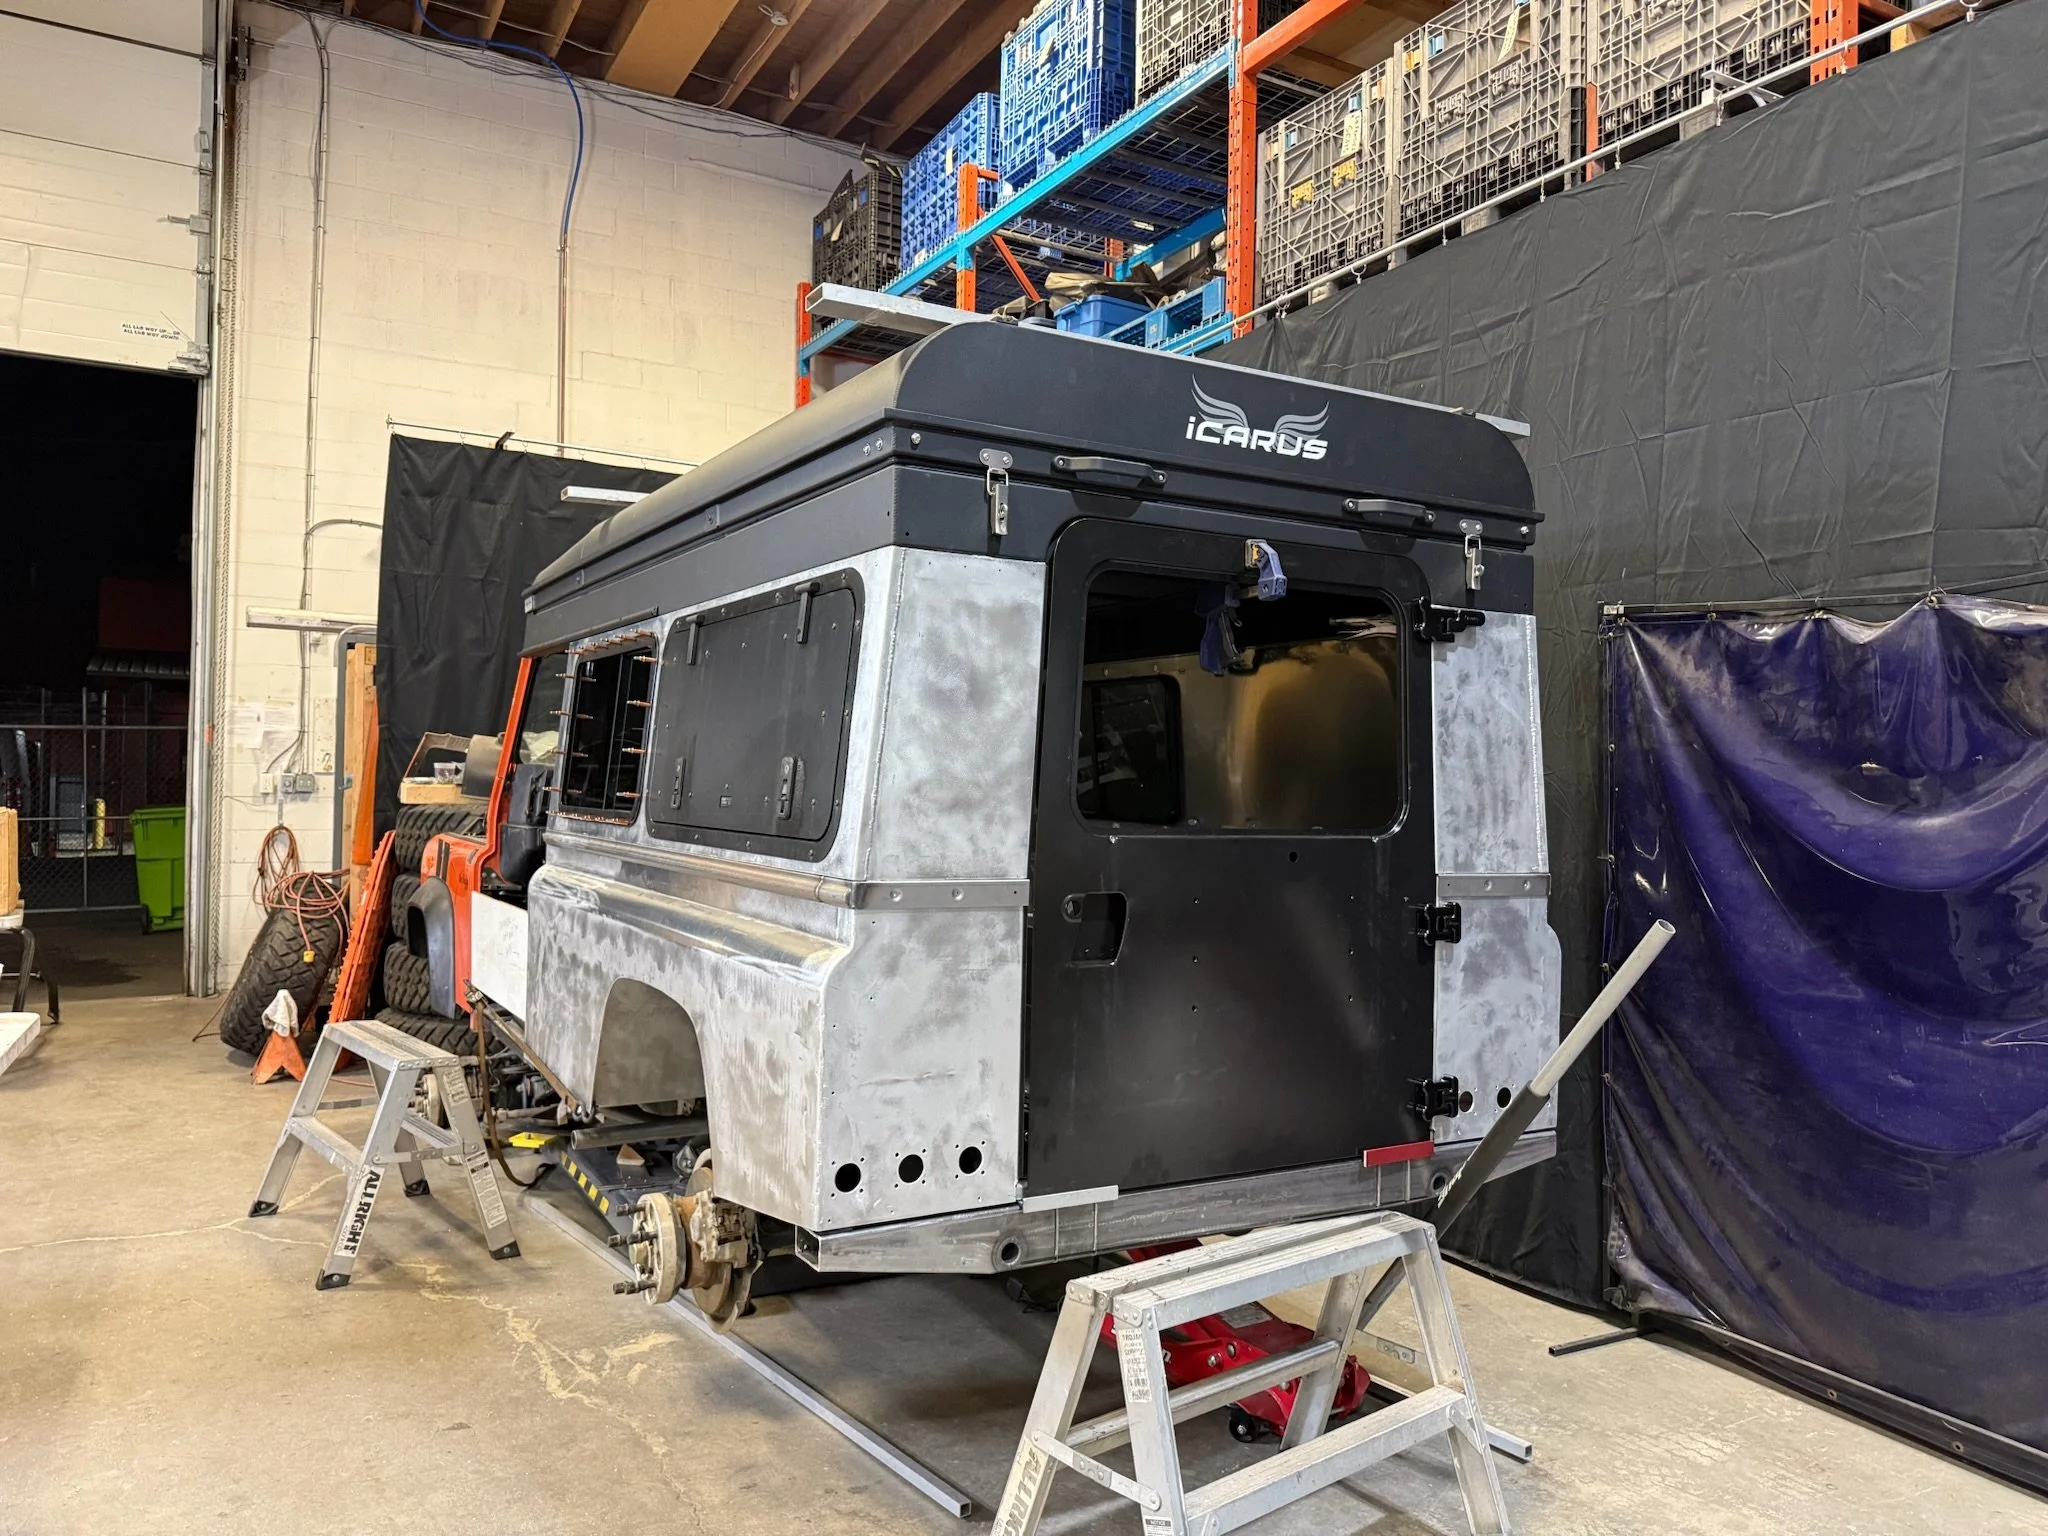
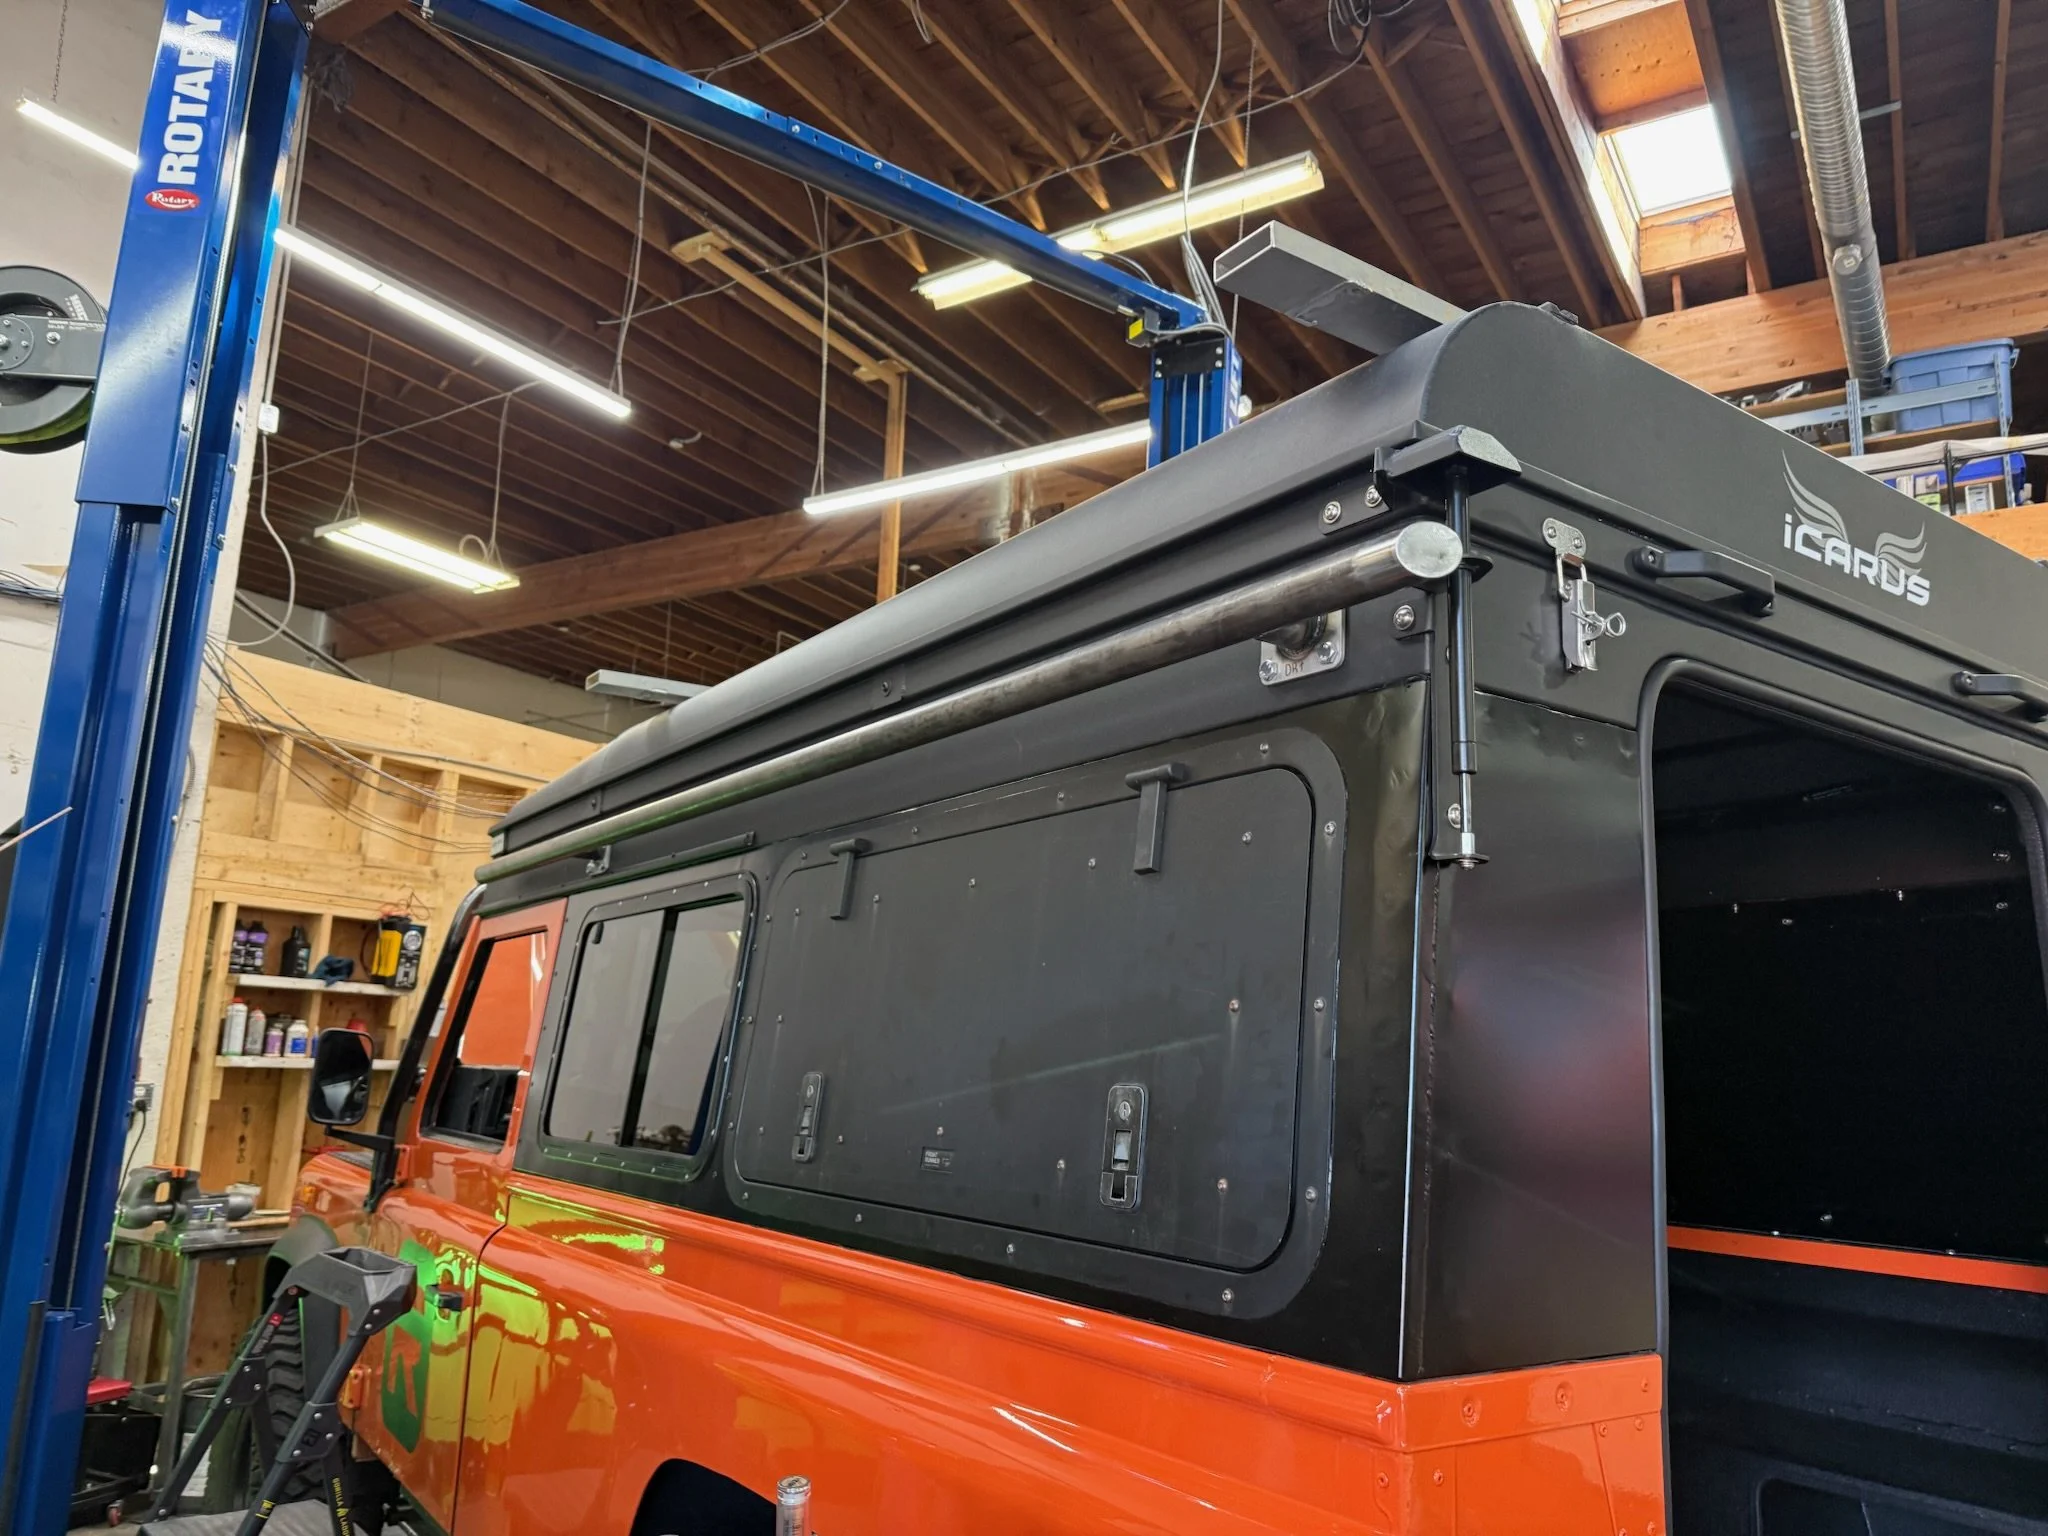
In February, I did a deep dive into the design making a lot of sketches and researching all the options. I have been off-roading and camping in Land Rover’s for over 30 years. I’ve slept in a tent on the ground, had a platform in the back of my Series 2a 88” and numerous roof top tents. Ground tents require a flat piece of ground and hopefully you don’t have water running underneath. The sleeping platform inside the vehicle is a good option but you have to empty out your gear every night so there is room to sleep. Roof top tents are nice but packing up, tucking in all the flaps then putting the cover on in the pouring rain is just annoying every single morning while everyone else is waiting for you! I wanted something that was easier to use and more convenient. The Alucab Icarus Pop-up roof seemed to solve all the issues and is the best, bolt on finished product on the market. The next question was, do I build my own pop up roof or spend the cash on the Alucab. Thankfully, we bought the last Alucab Icarus from Cap-It and it solved a lot of problems and saved a lot of potential design and fabrication time.
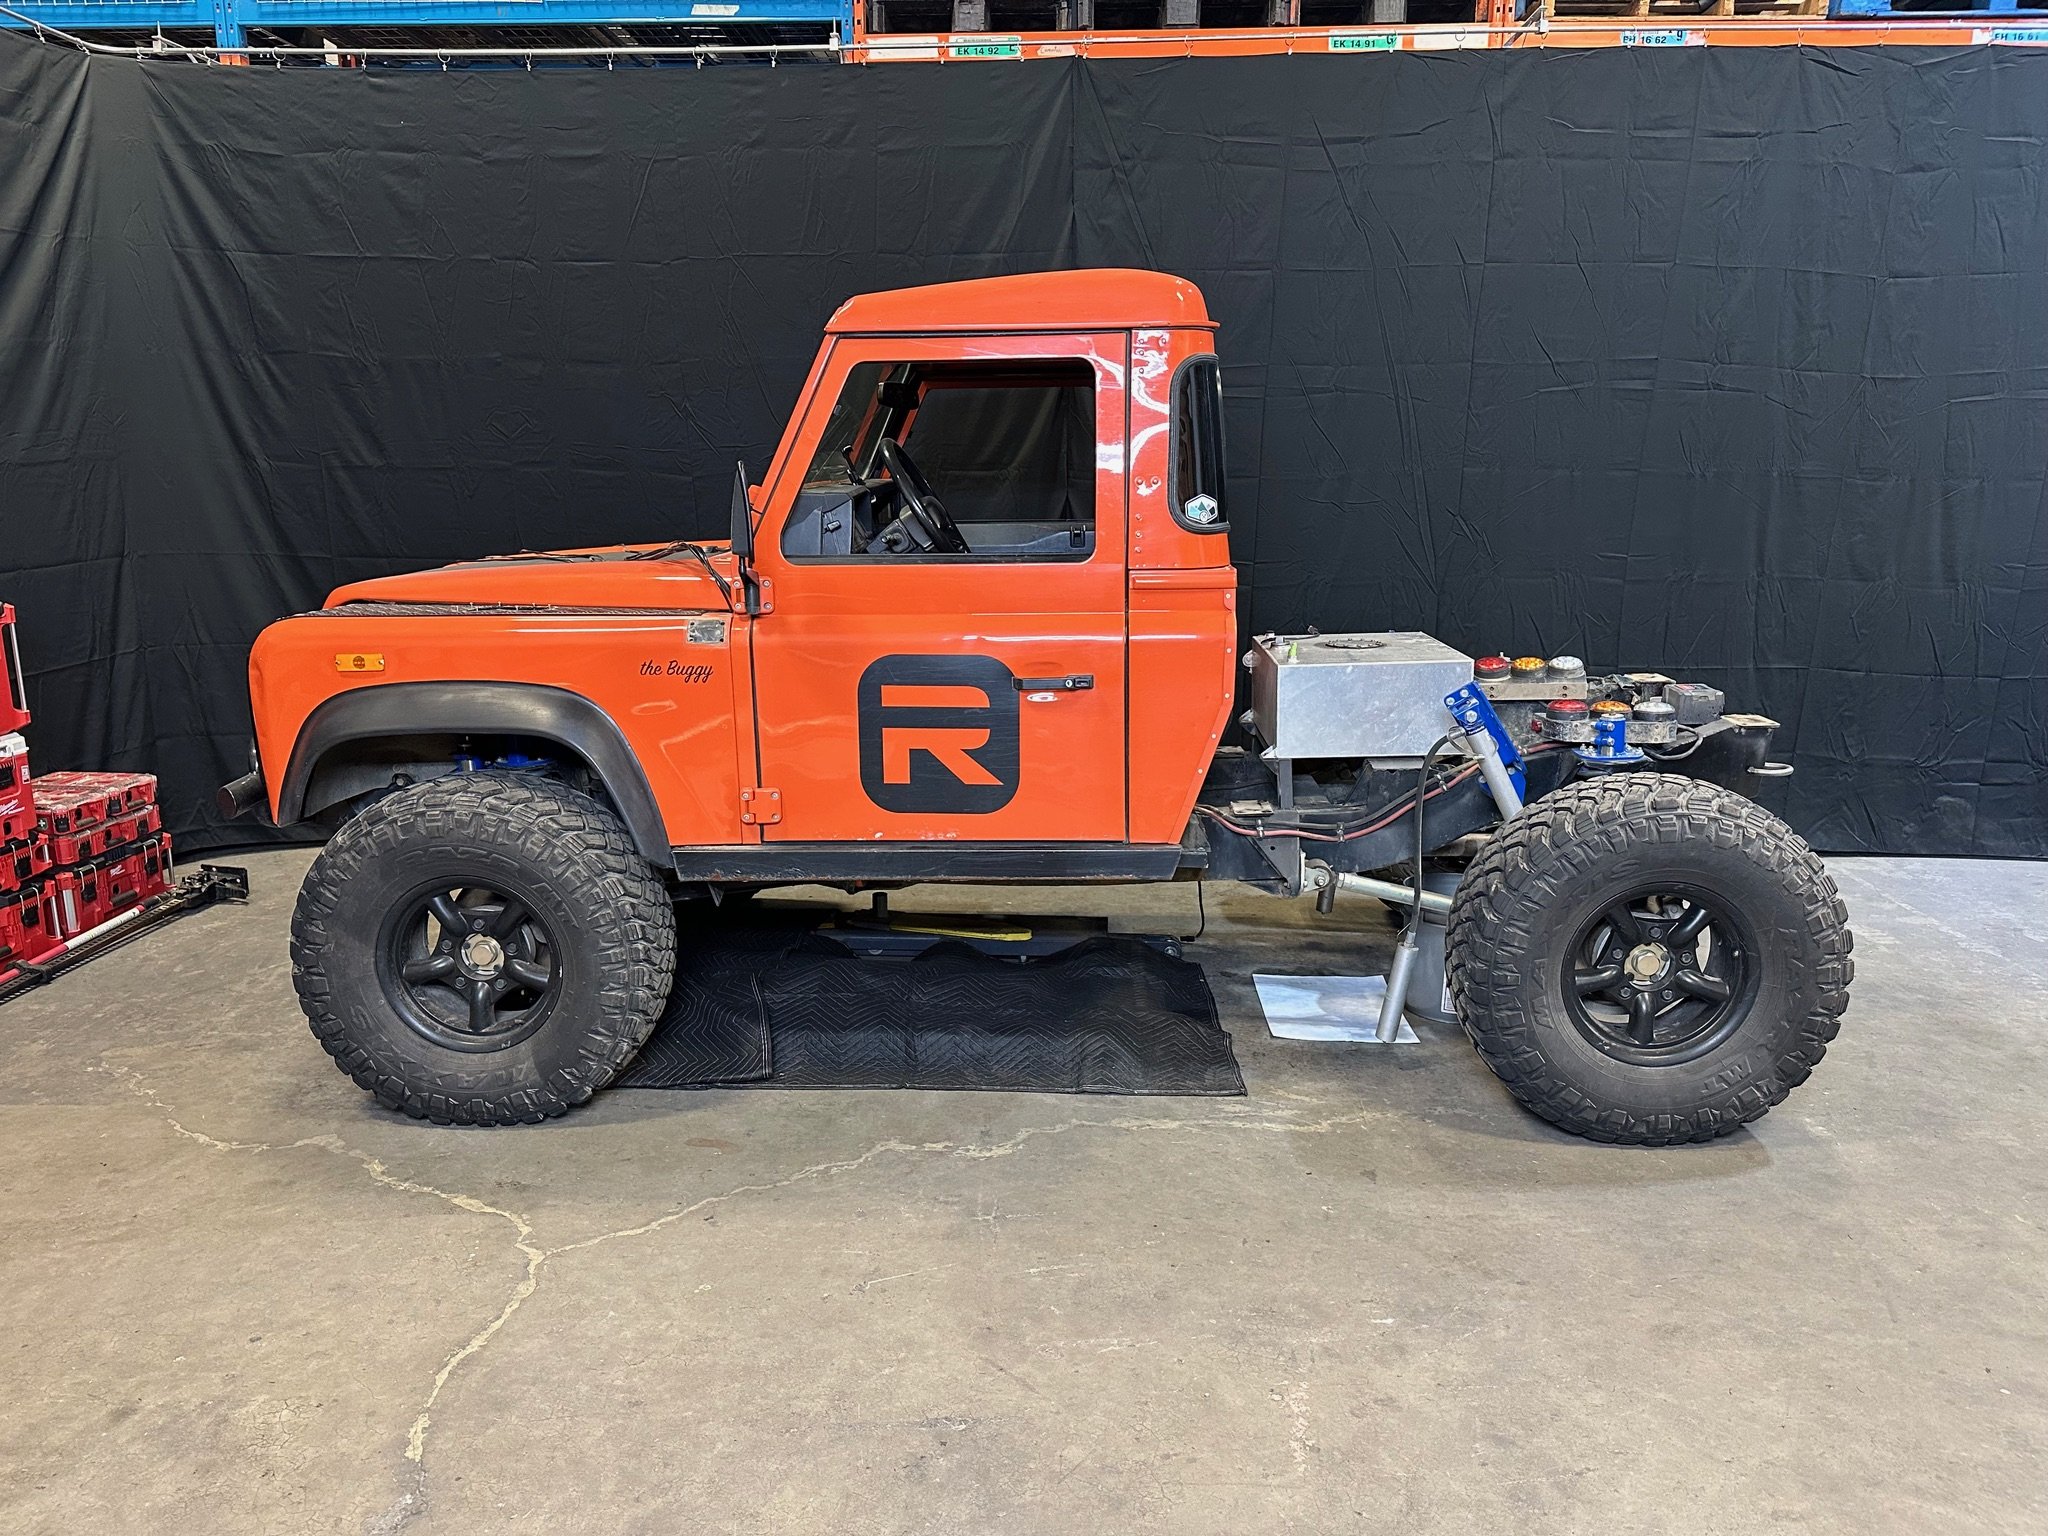
So why not use another vehicle to build a camping themed vehicle? It has been a topic of debate for over a year. I have found that when you have multiple vehicles for different use cases, you can never fully commit to the one! There can really only be ONE truck to rule them all! It just doesn’t make sense to park all the value built into the buggy and start over at many times the cost. The Buggy was the best starting point for a dedicated, offroad camper and realistically, my only hope of completing the project in time for the trip! We planned to keep everything from the doors forward. So the engine, transmission, transfer case, axles and suspension would remain as is along with the front half of the bodywork. It all seemed rather simple, but even with all my experience building vehicles, my optimistic nature took over and it was A LOT to take on!


Disassembly
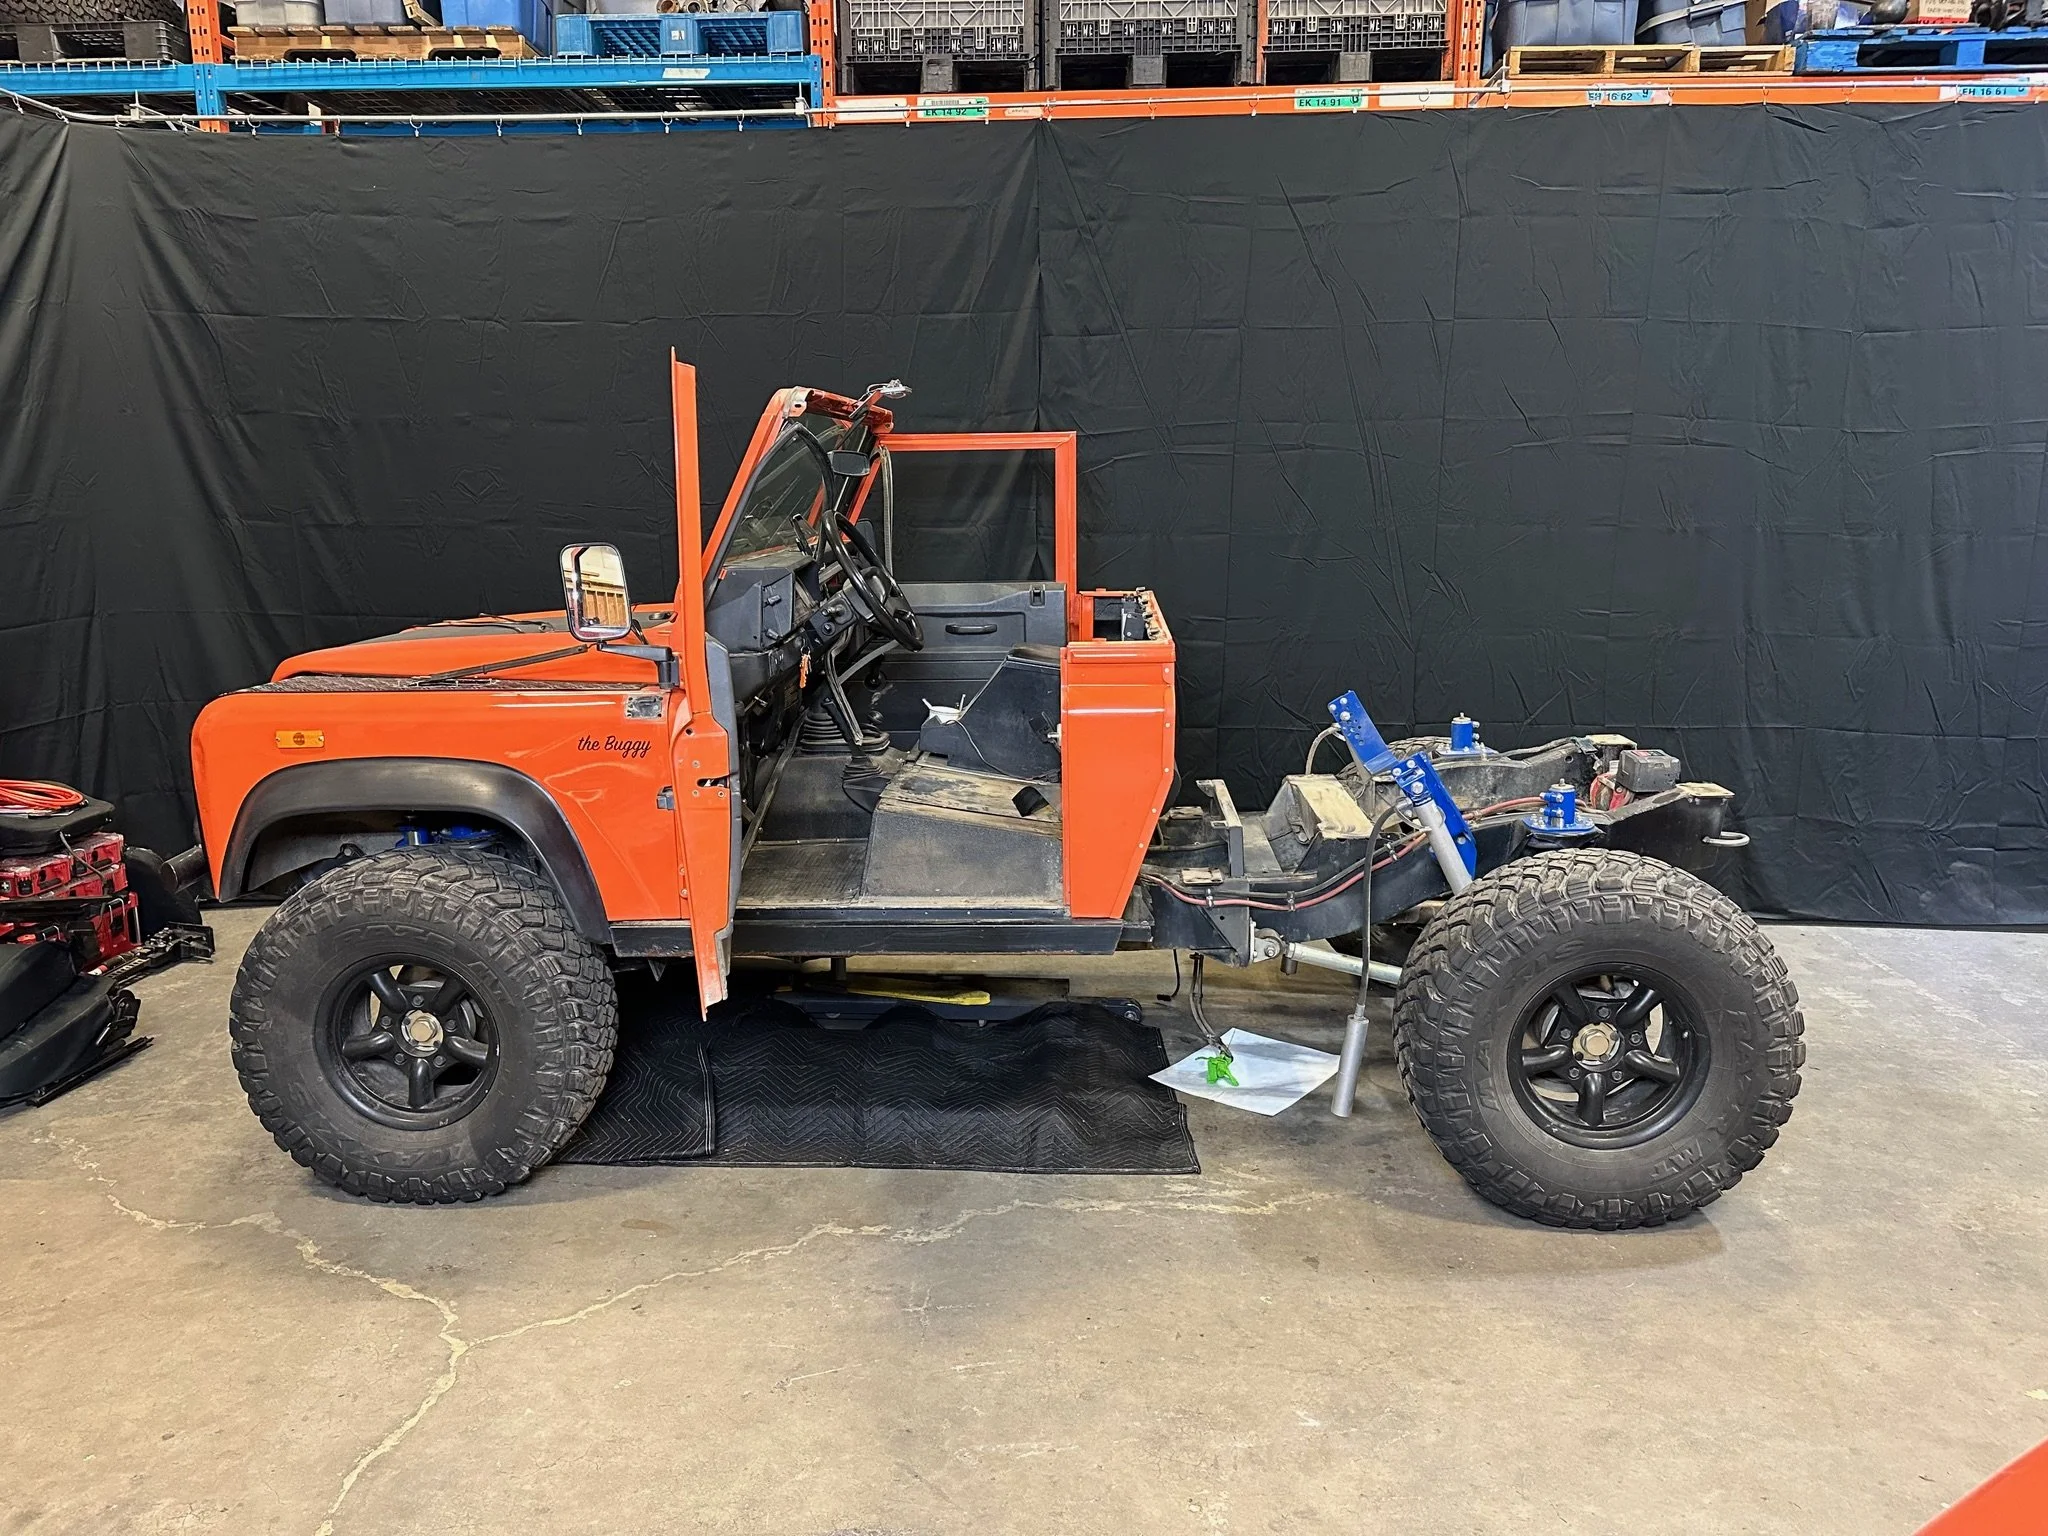
I was hesitant to start disassembling the Buggy until I had some of the big pieces for the build ready. I also needed to document the original Buggy with photos and a video one last time before it was history. Finally, in Mid-March, the Buggy was parked in the corner for filming and disassembly. This went fast. We had the back half fully stripped down to the chassis in one day.

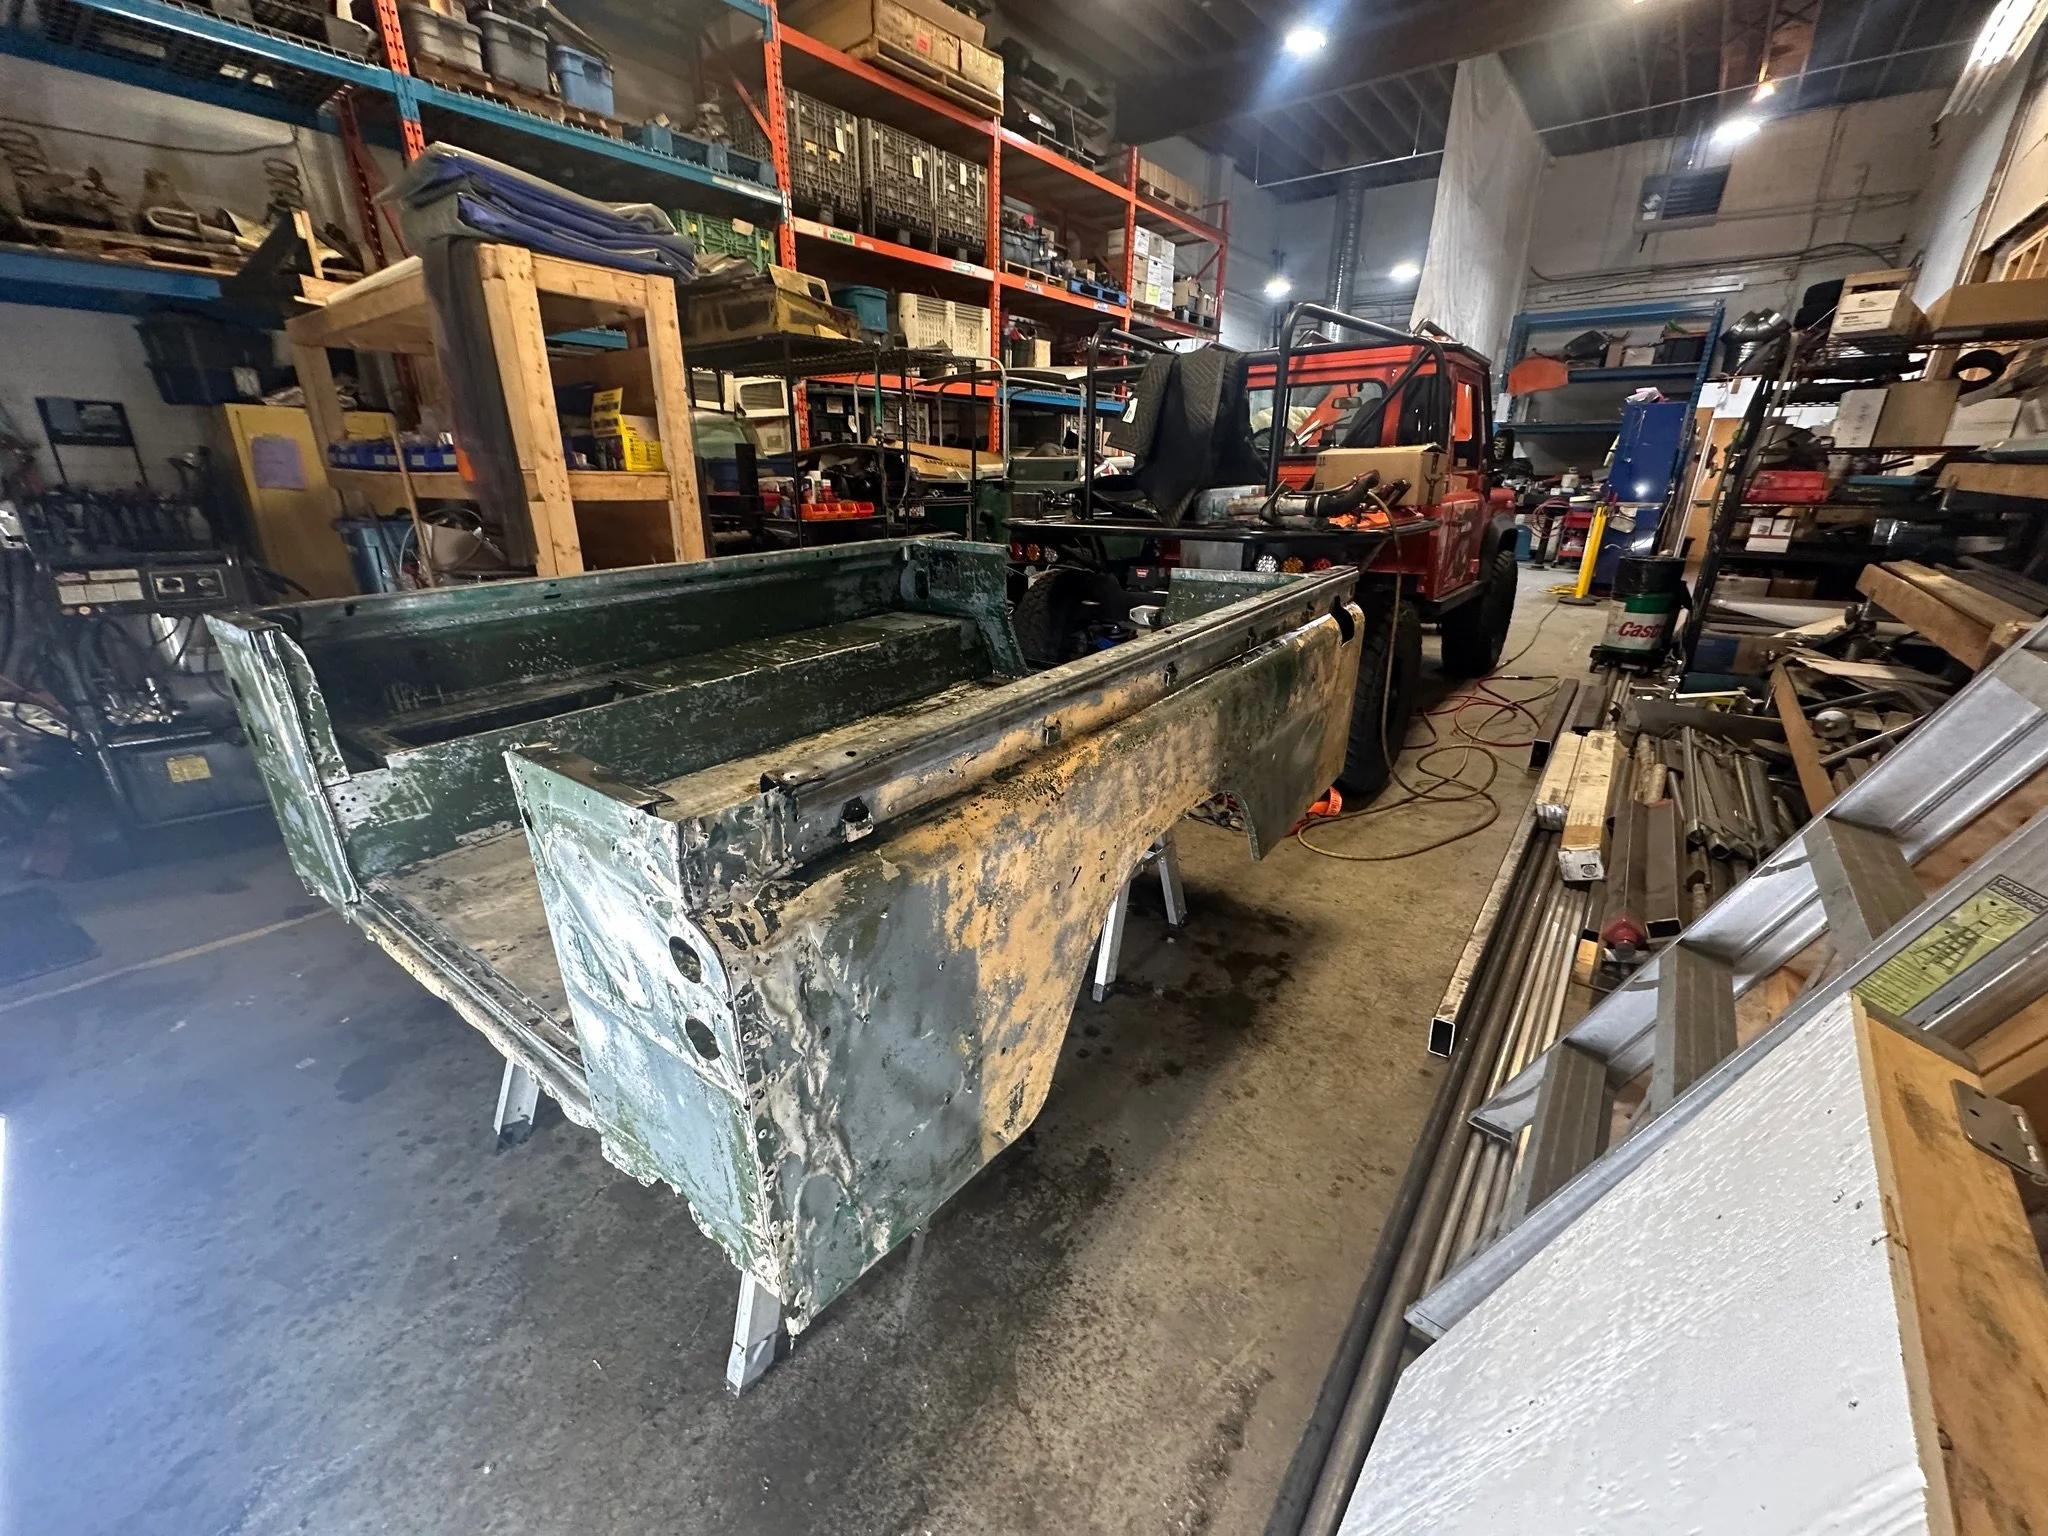
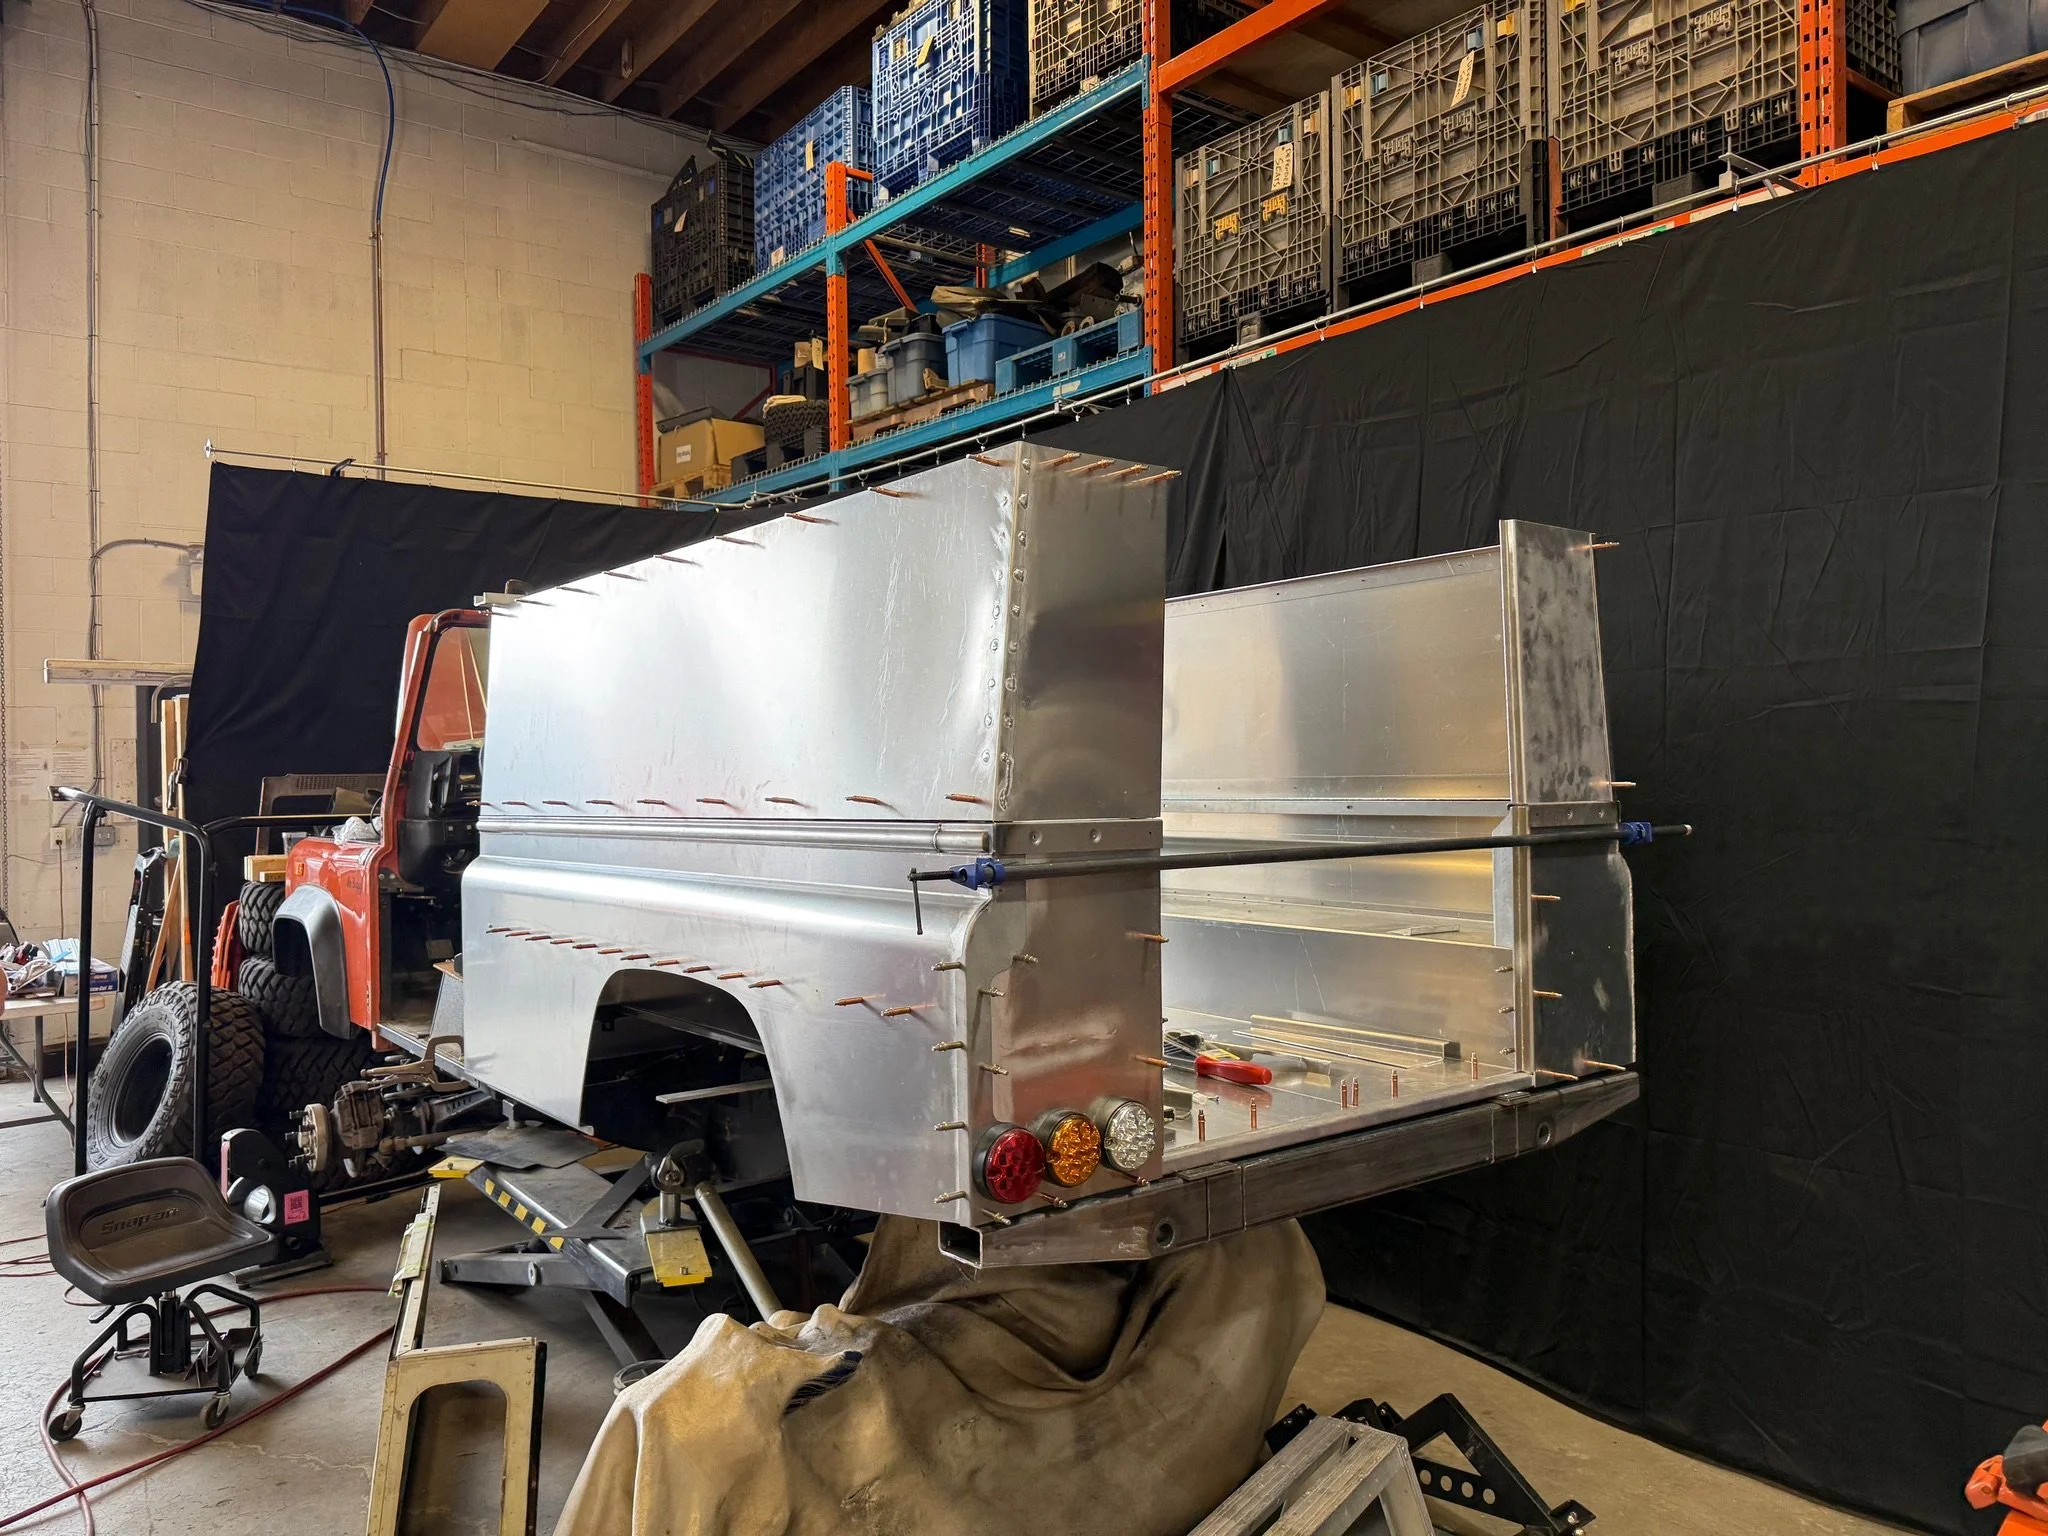
Tub
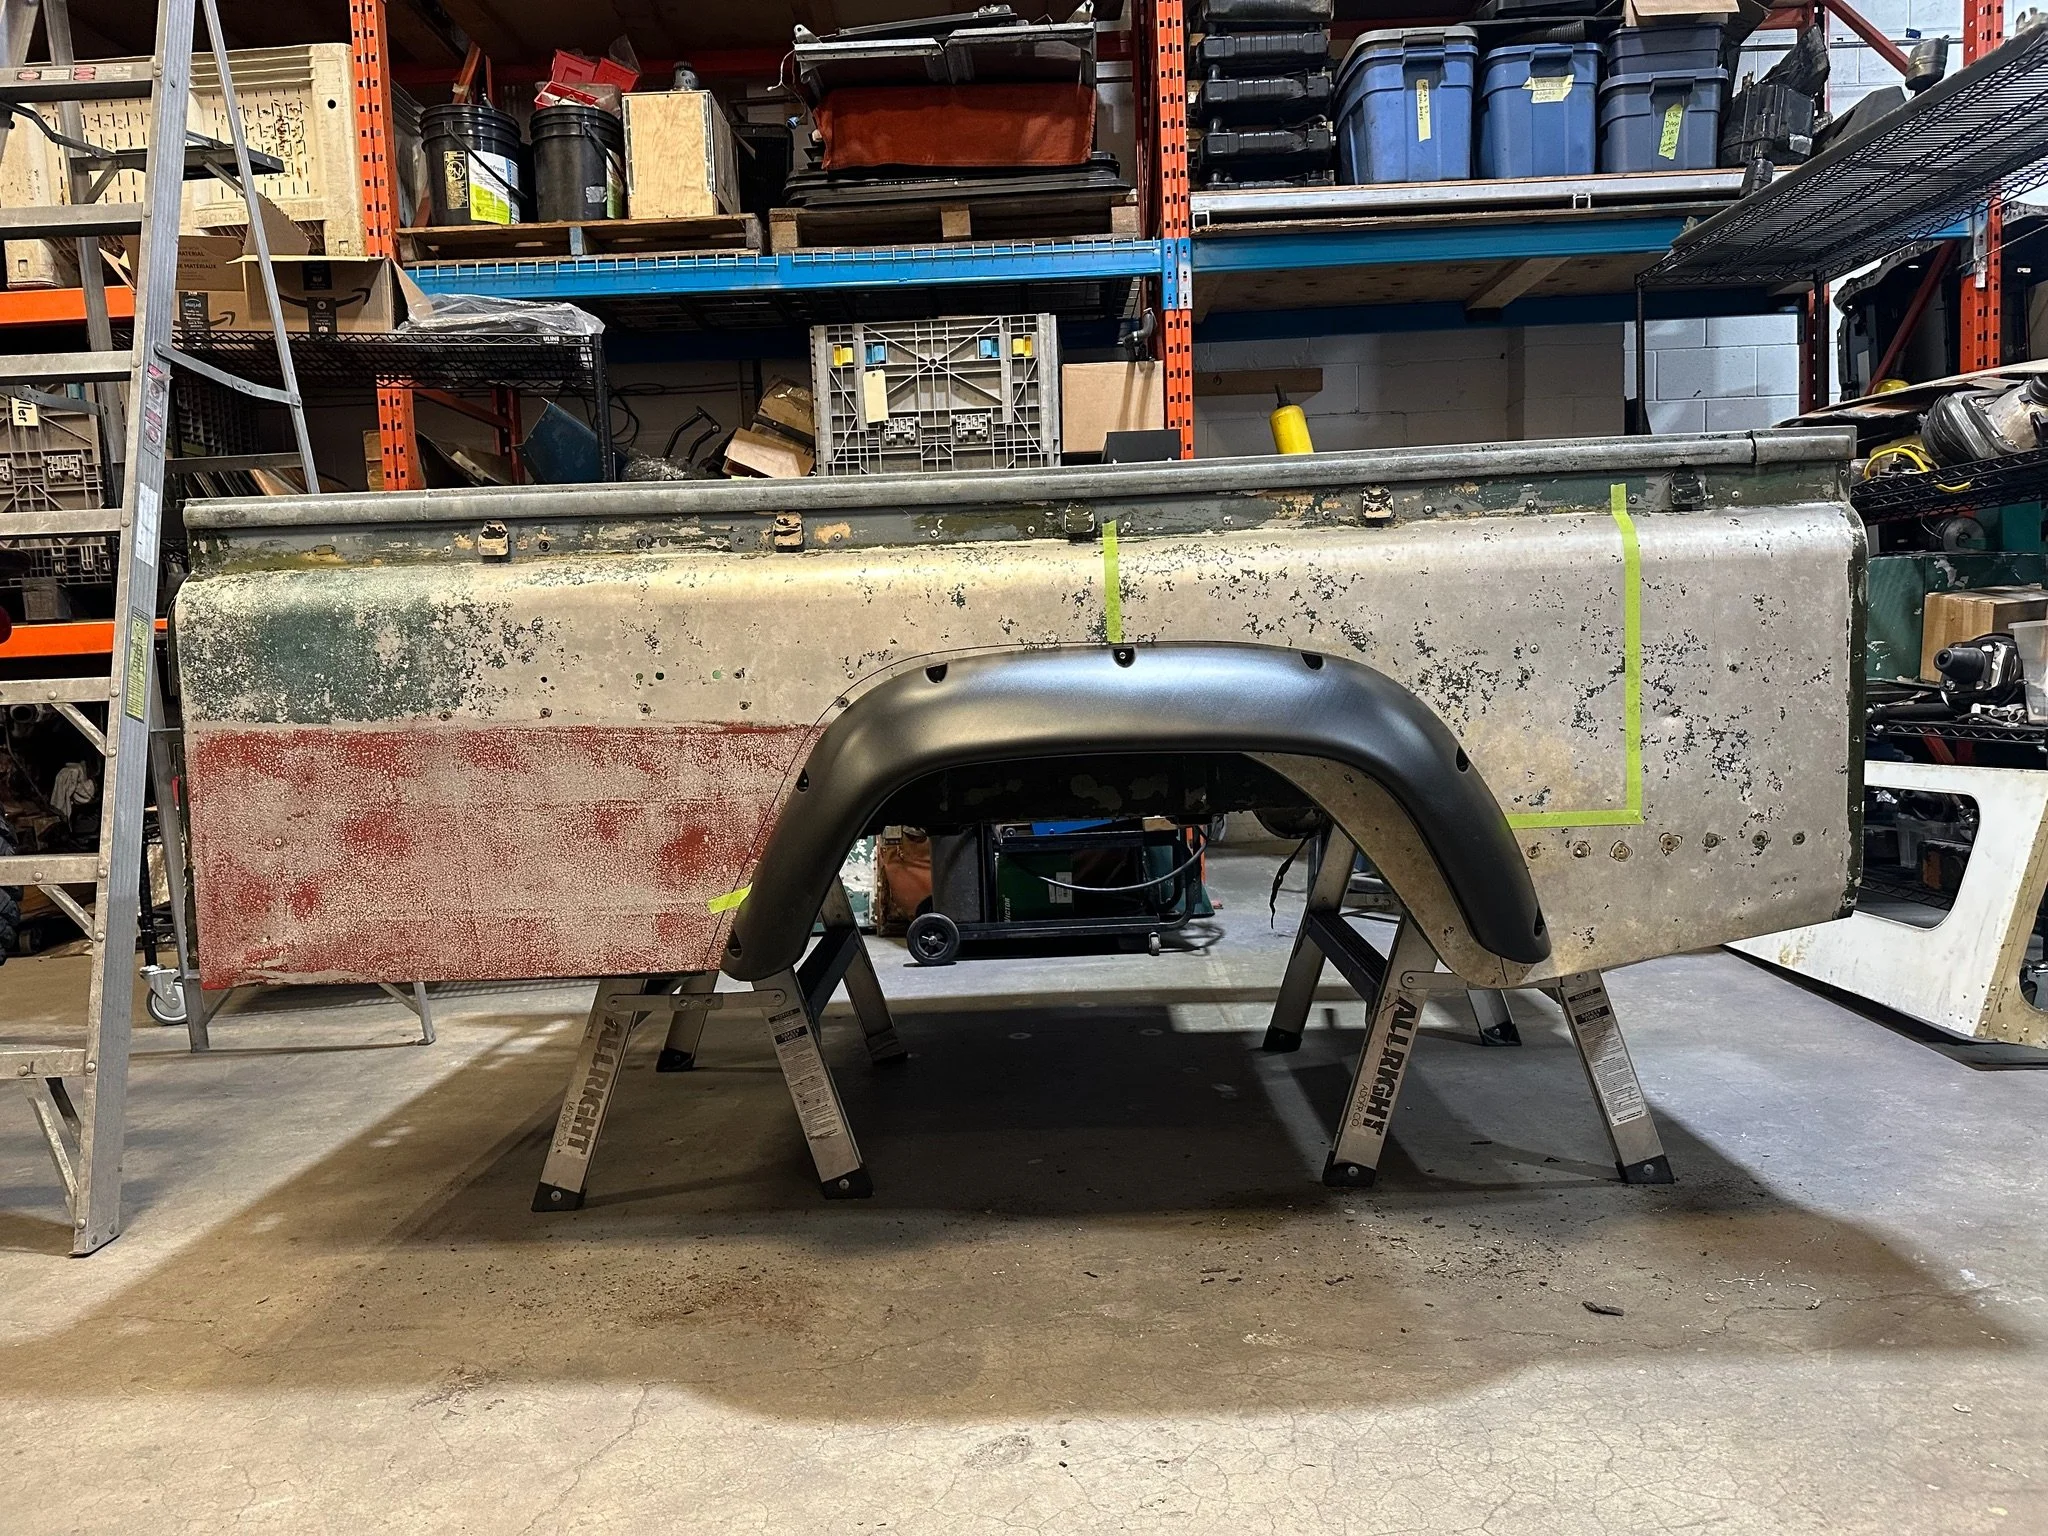
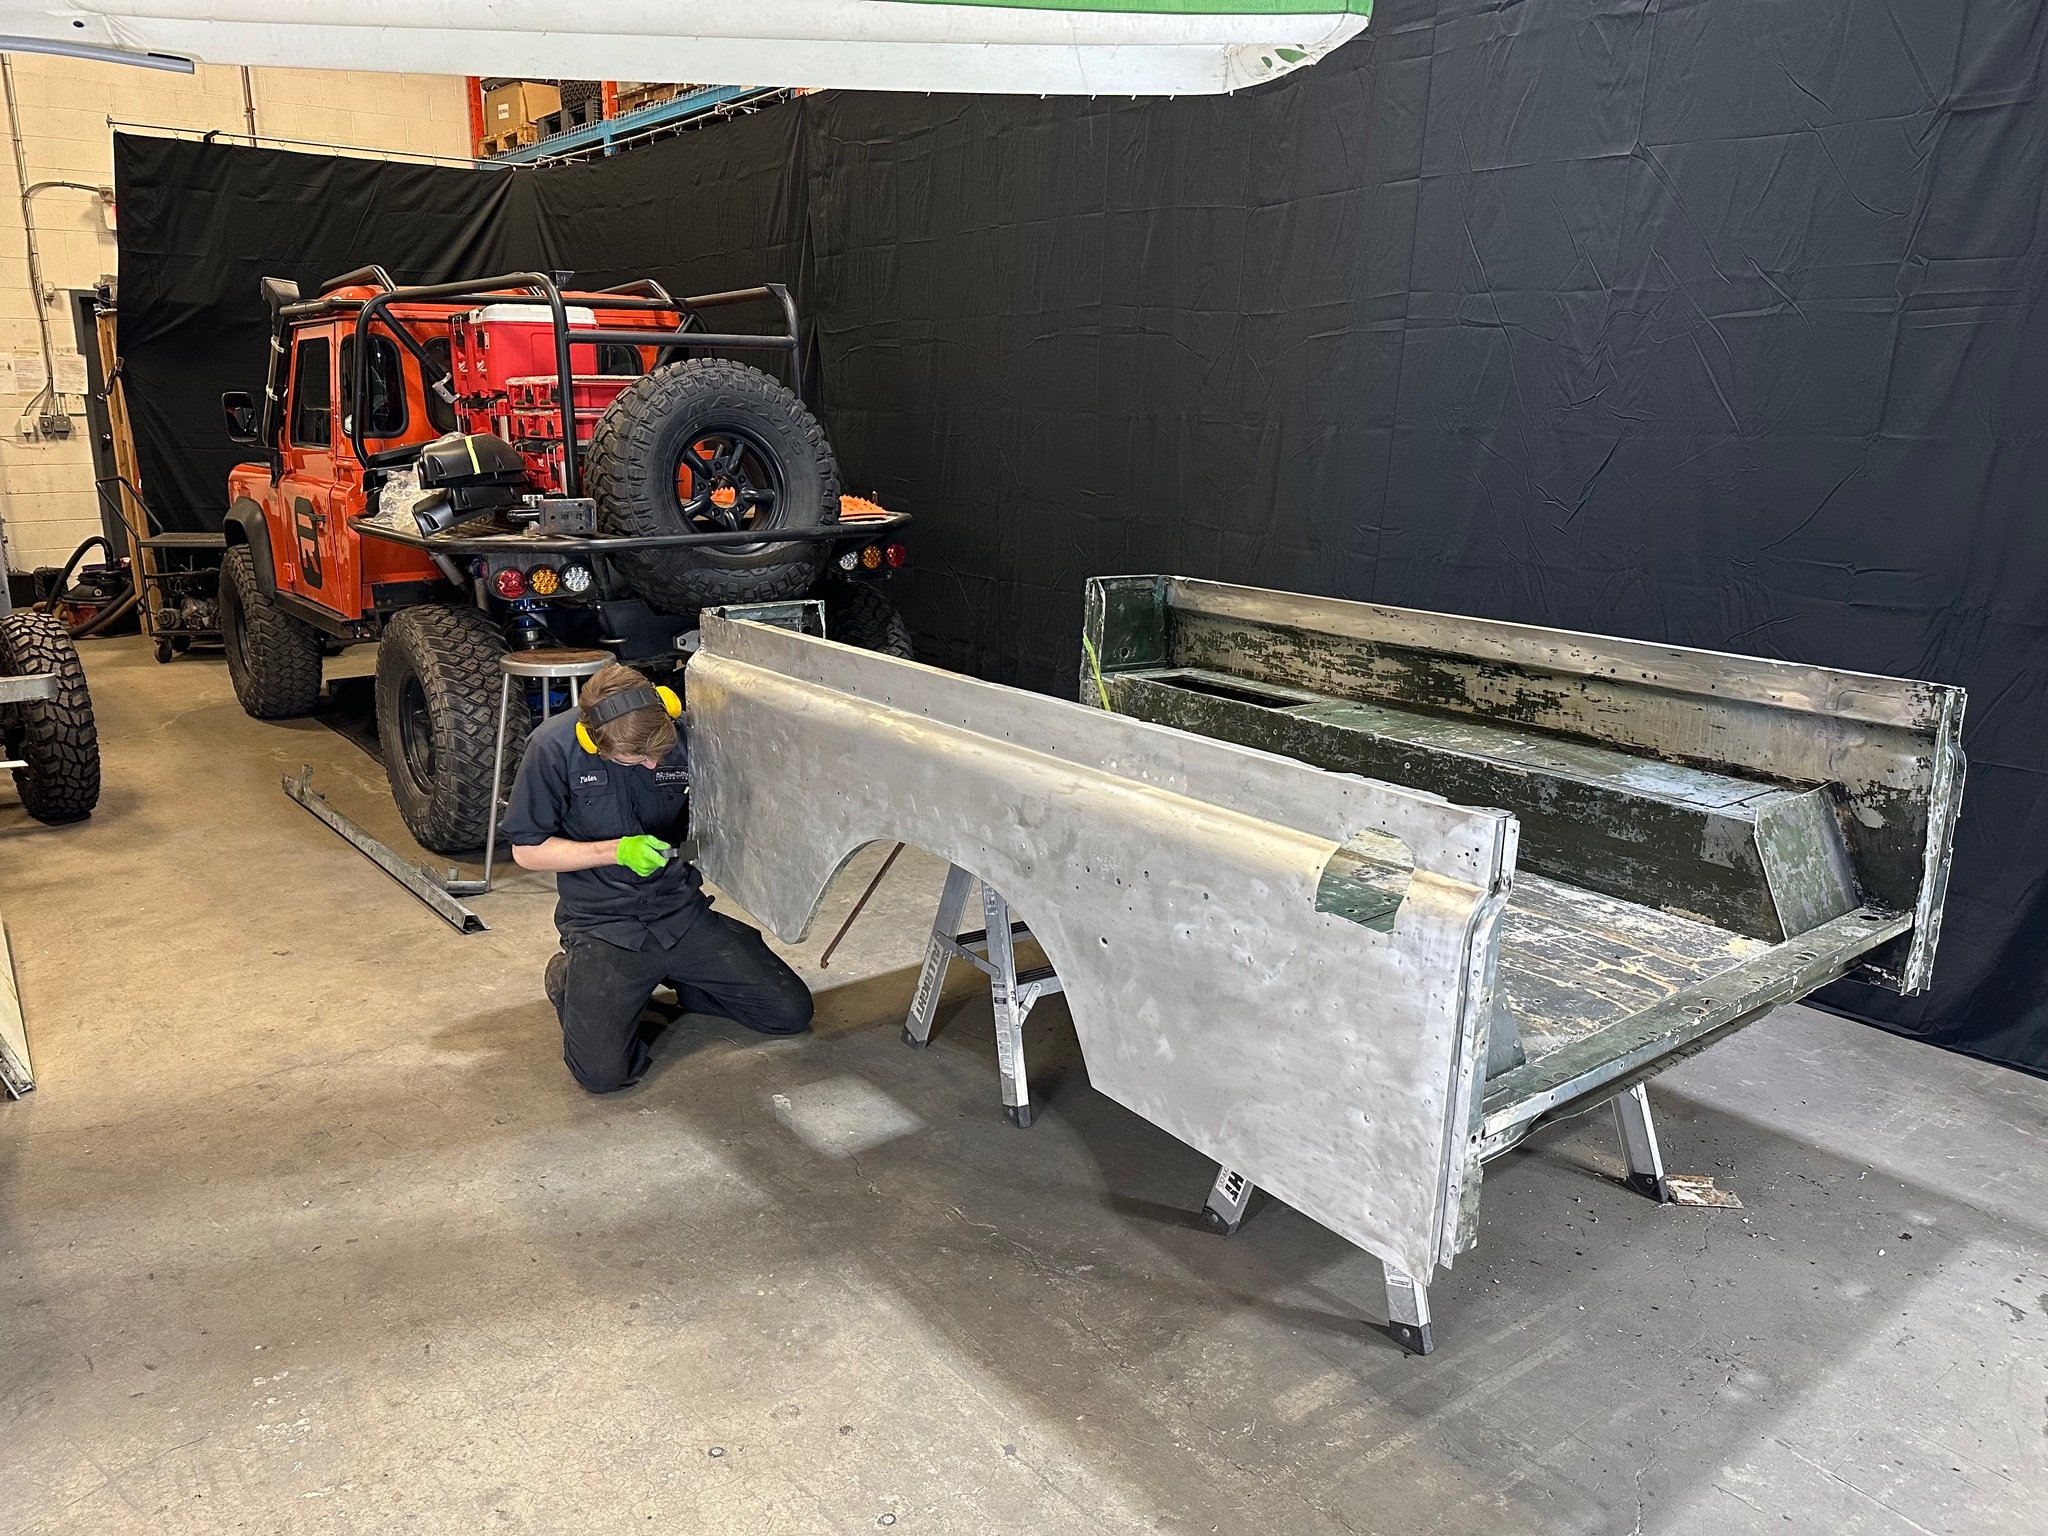
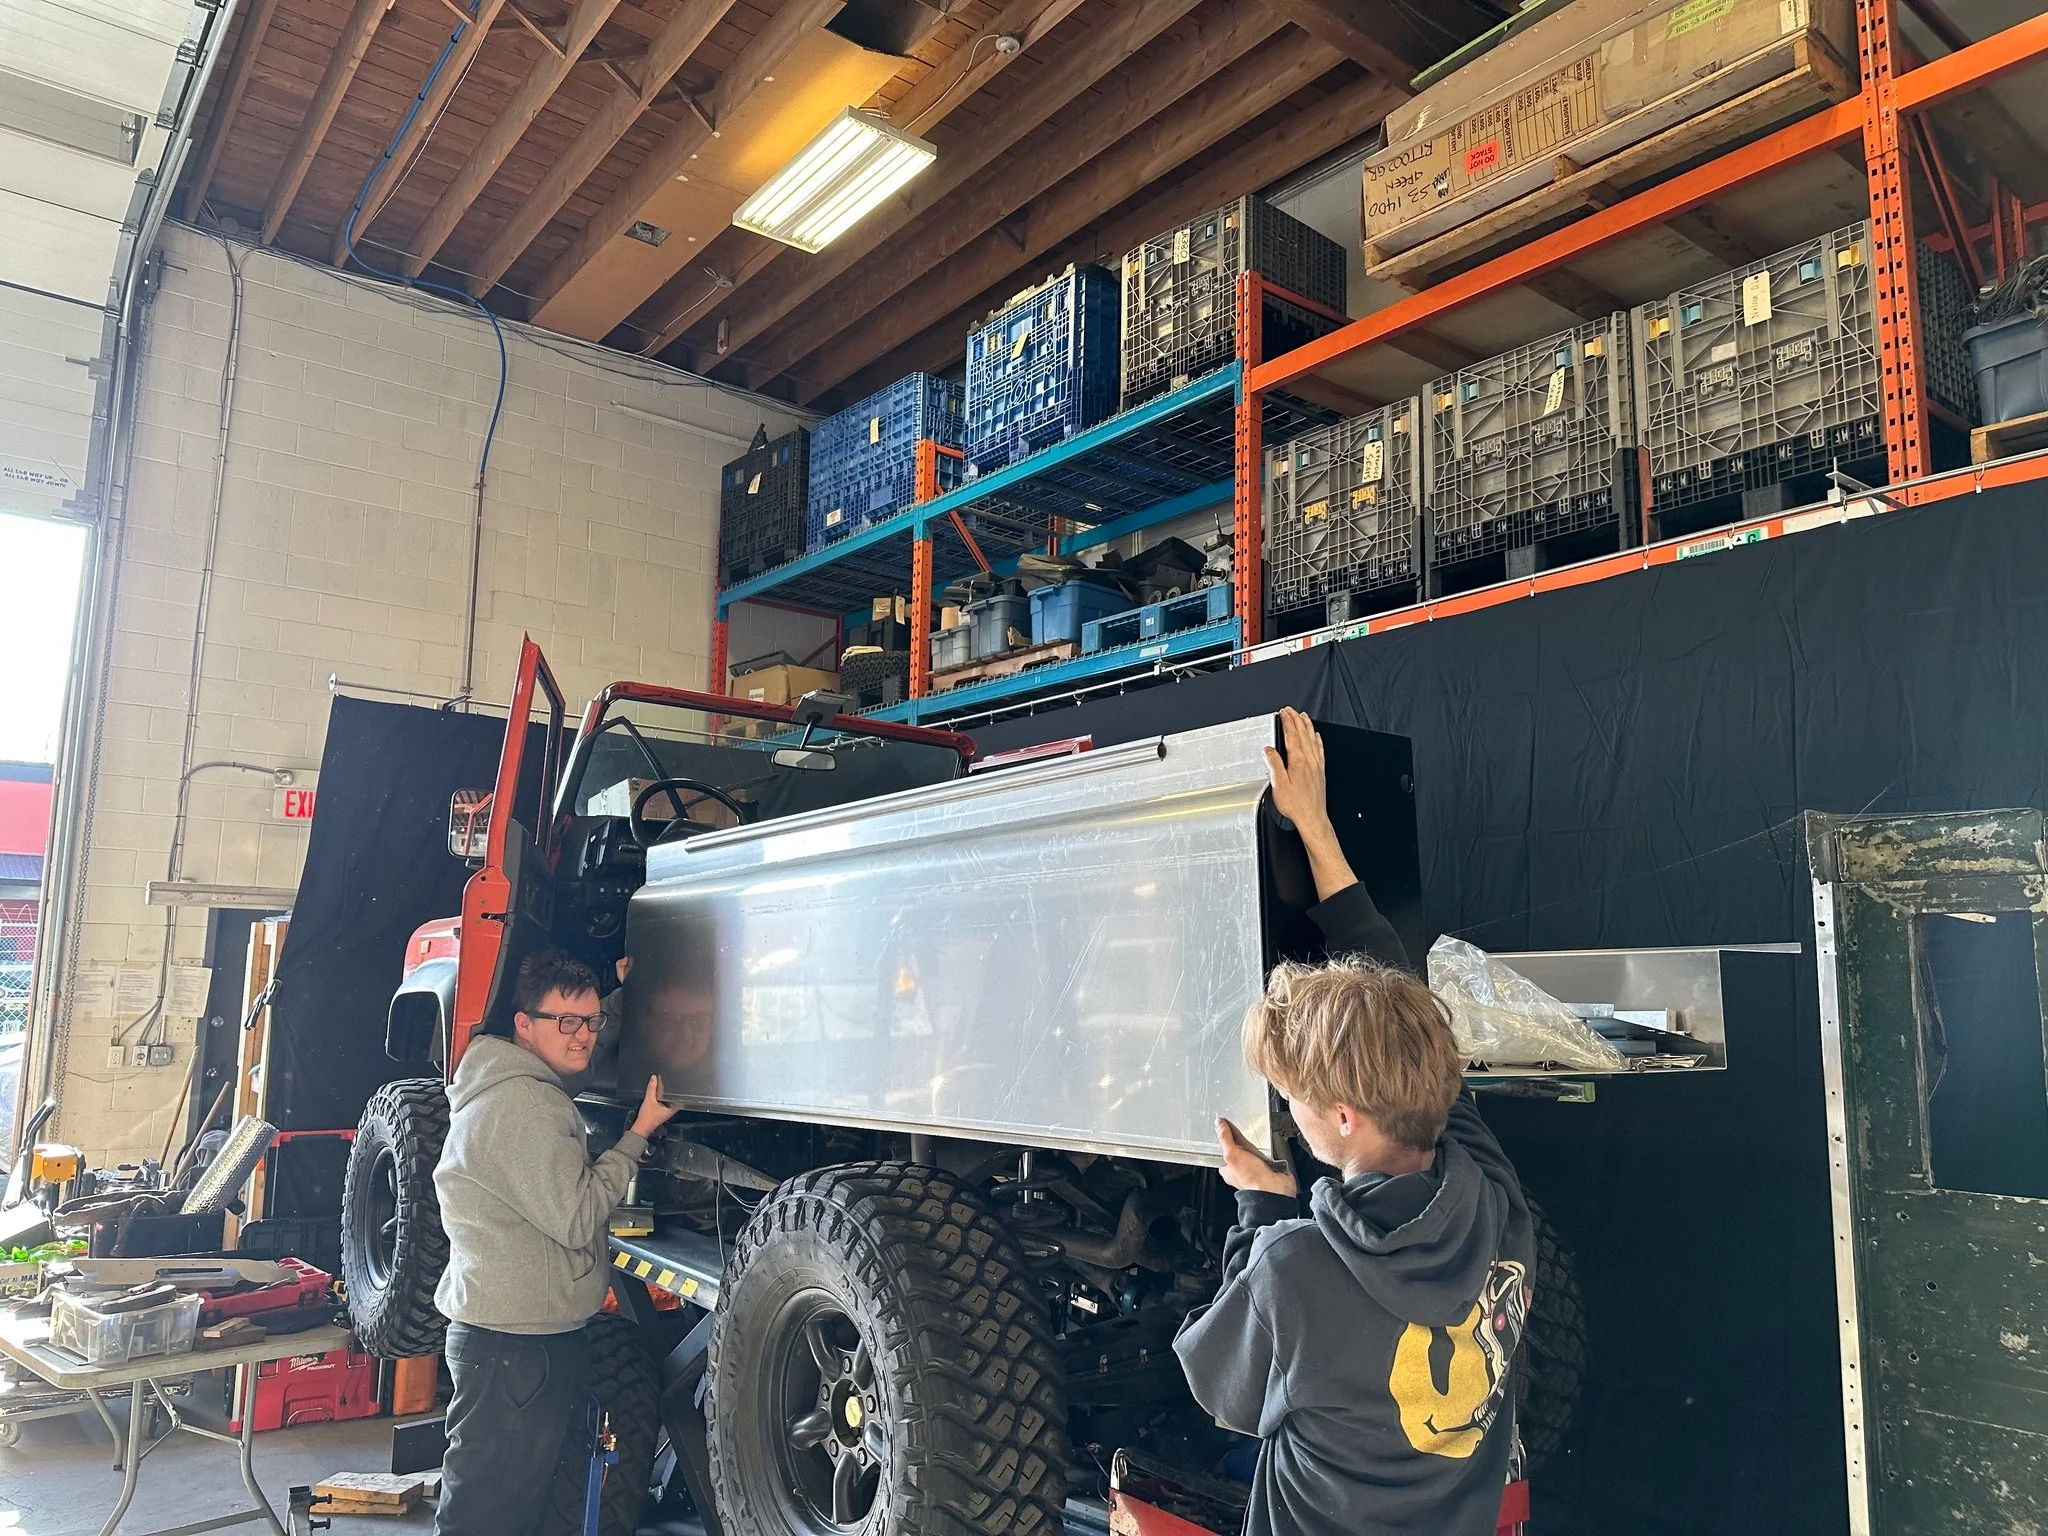
To make the AluCab roof tent work, I needed a 110 body and thus a 2-door Tub. There was a bit of discussion on how to make the 110 based roof work but still keep the bob tailed departure angles of the original buggy. I had a ex-MOD Series 3 109” 2-door tub on the island, so we brought it back to the city at the beginning of March and started cleaning it up. We test fit the 109 tub onto what was left of the chassis and WOW it was so long, it looked so weird. We spent some time thinking about how we could chop the back down at an angle or even shorten up the whole body with a custom build pop-up roof. In the end, we purchased the Alucab Icarus on March 14th. After weeks of power washing, paint striping, metal cleaning, dent repairs, etc. The floor was still just a mess of dents and a few holes. So, I decided to make a new floor with ⅛” aluminum which arrived on March 27. Now we had a shinny new floor, I just couldn’t bring myself to use the old battered up tub. So, we started looking for new tub sides. There were new Land Rover options available, but at significant expense. On a recommendation, I reached out to Aqualu in Kelowna and they were happy to bend and roll a pair of tub sides to my custom specifications. It was a very reasonable price and we were supporting another Canadian business. Now we were building a new tub from scratch. If only I knew how much work this was actually gonna be!


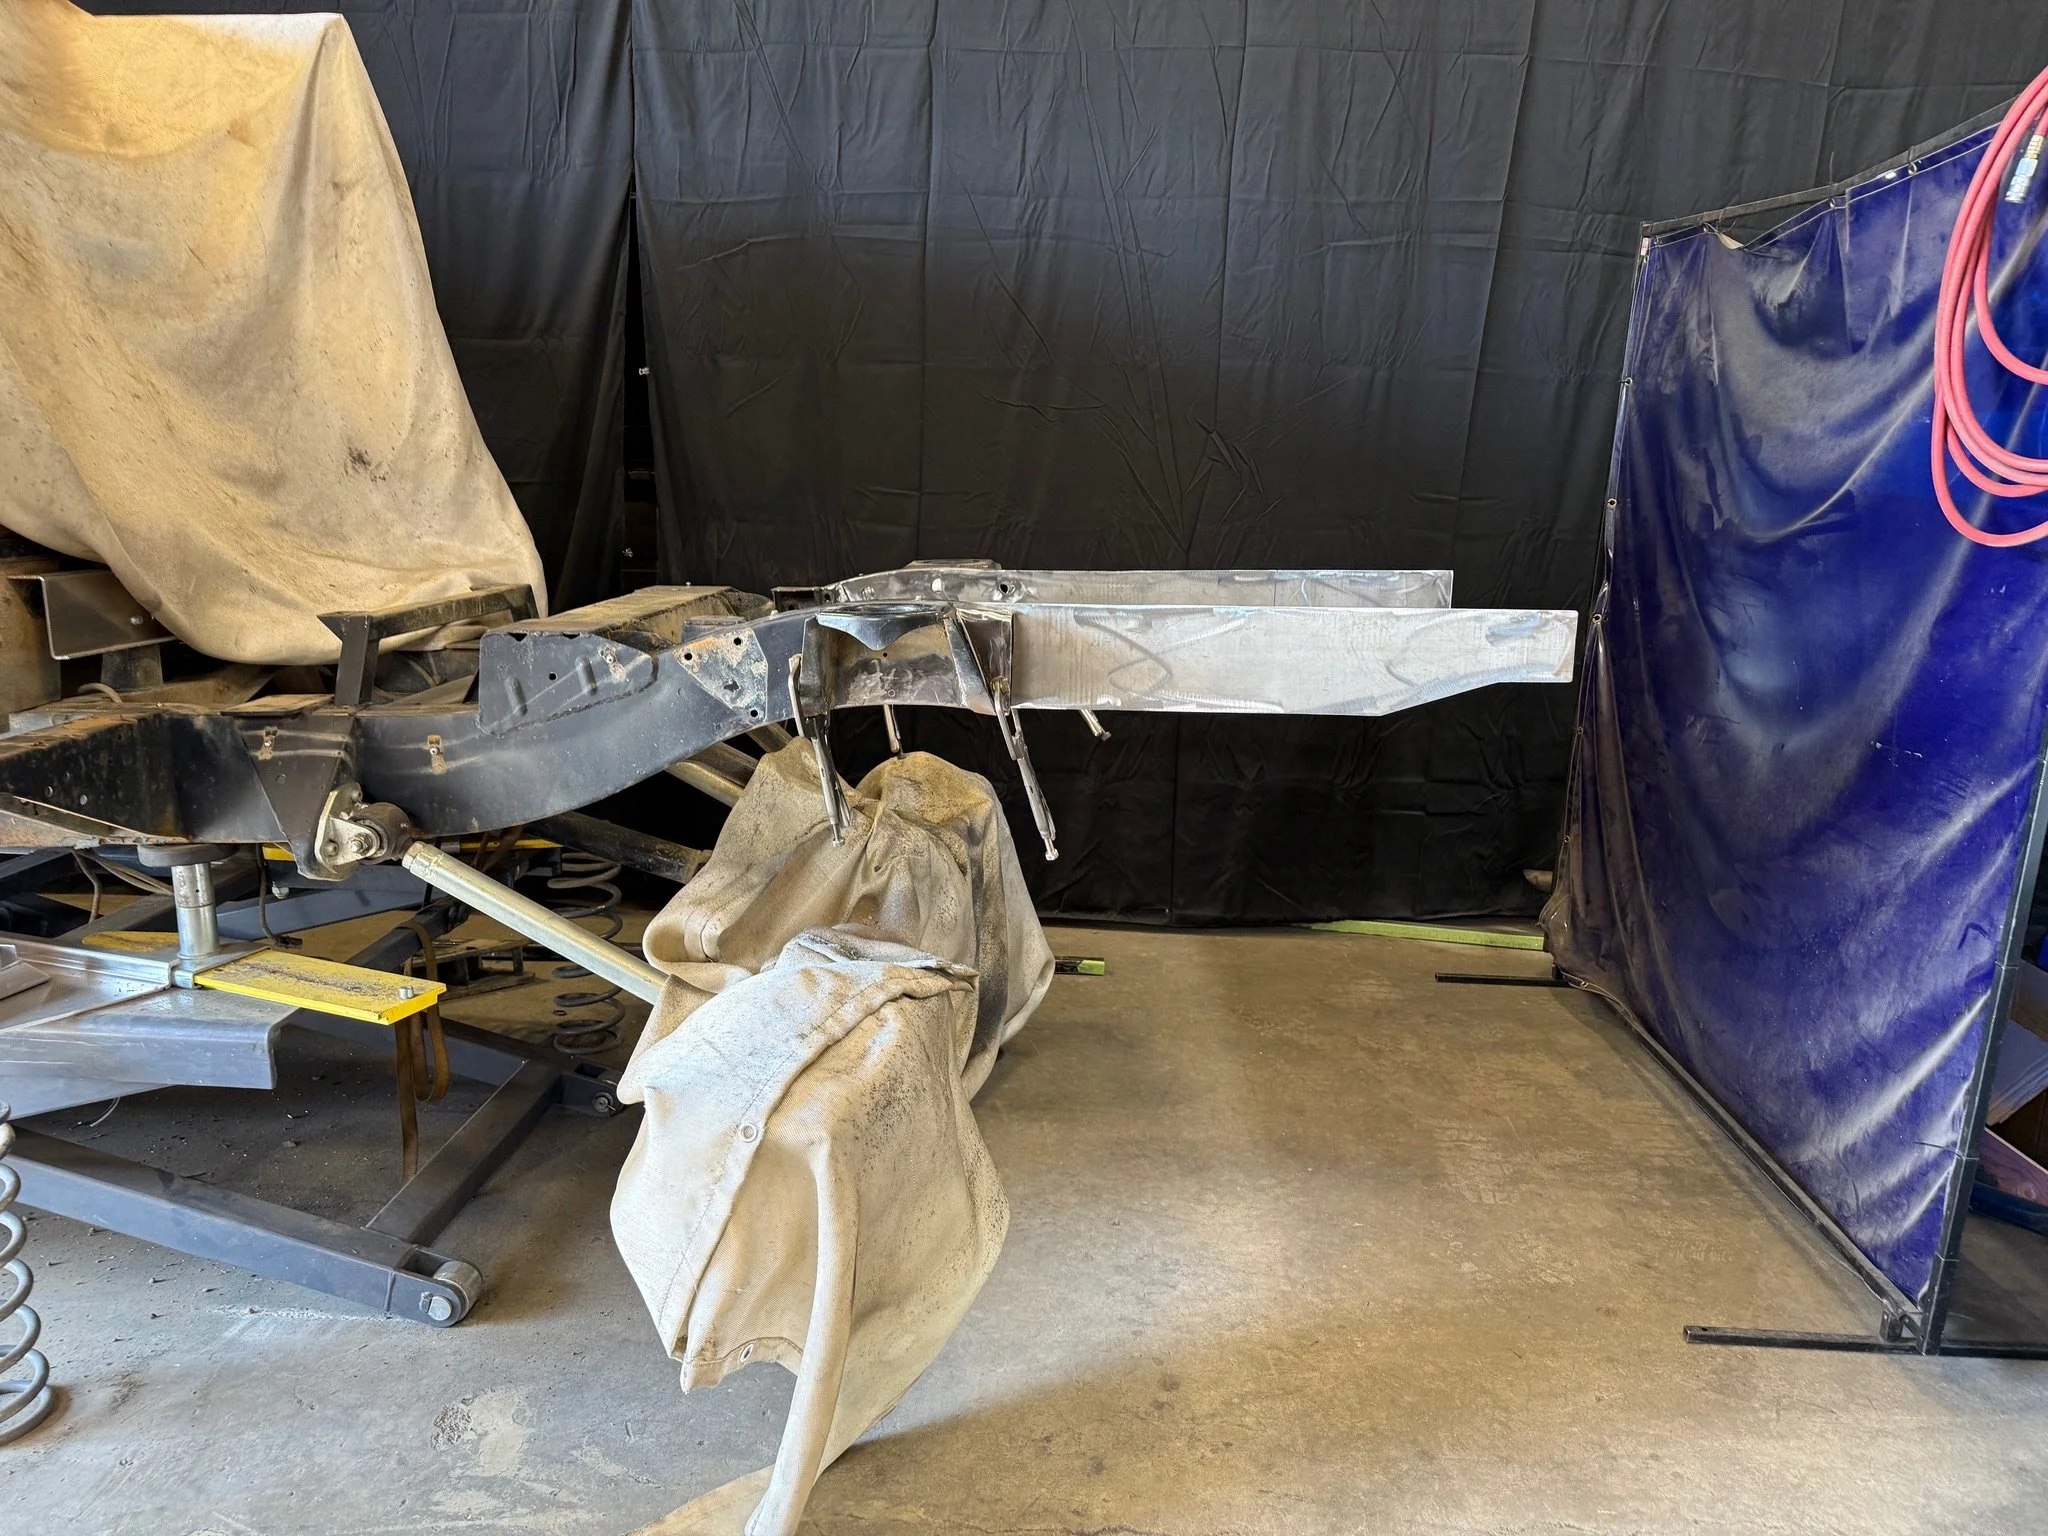
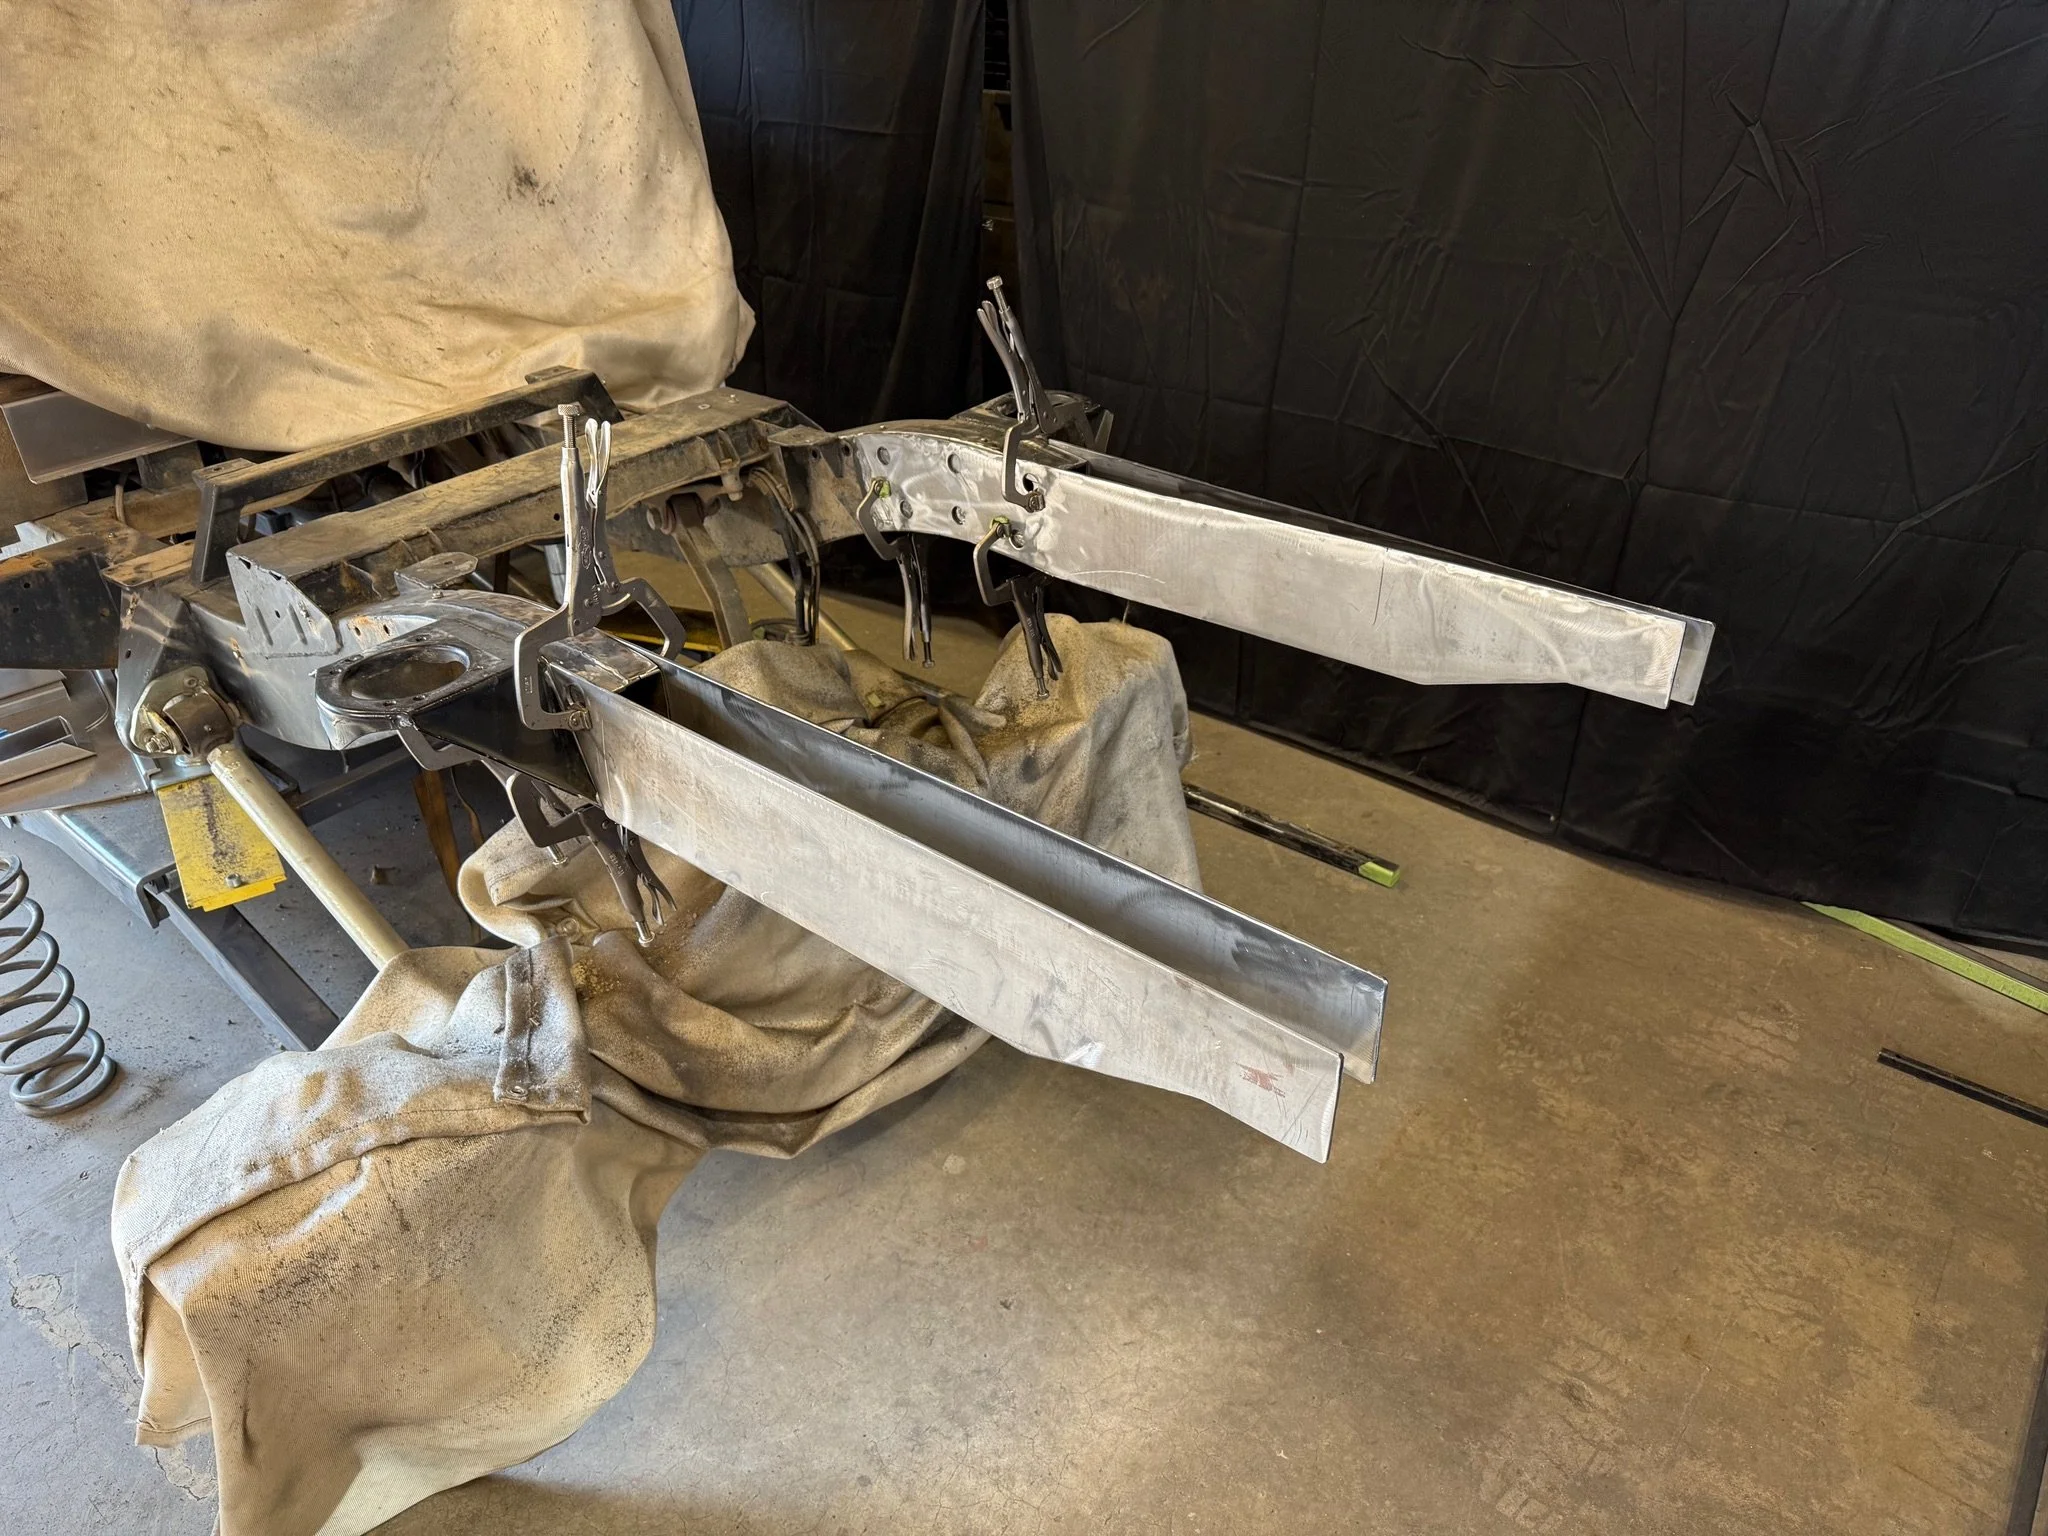
Chassis
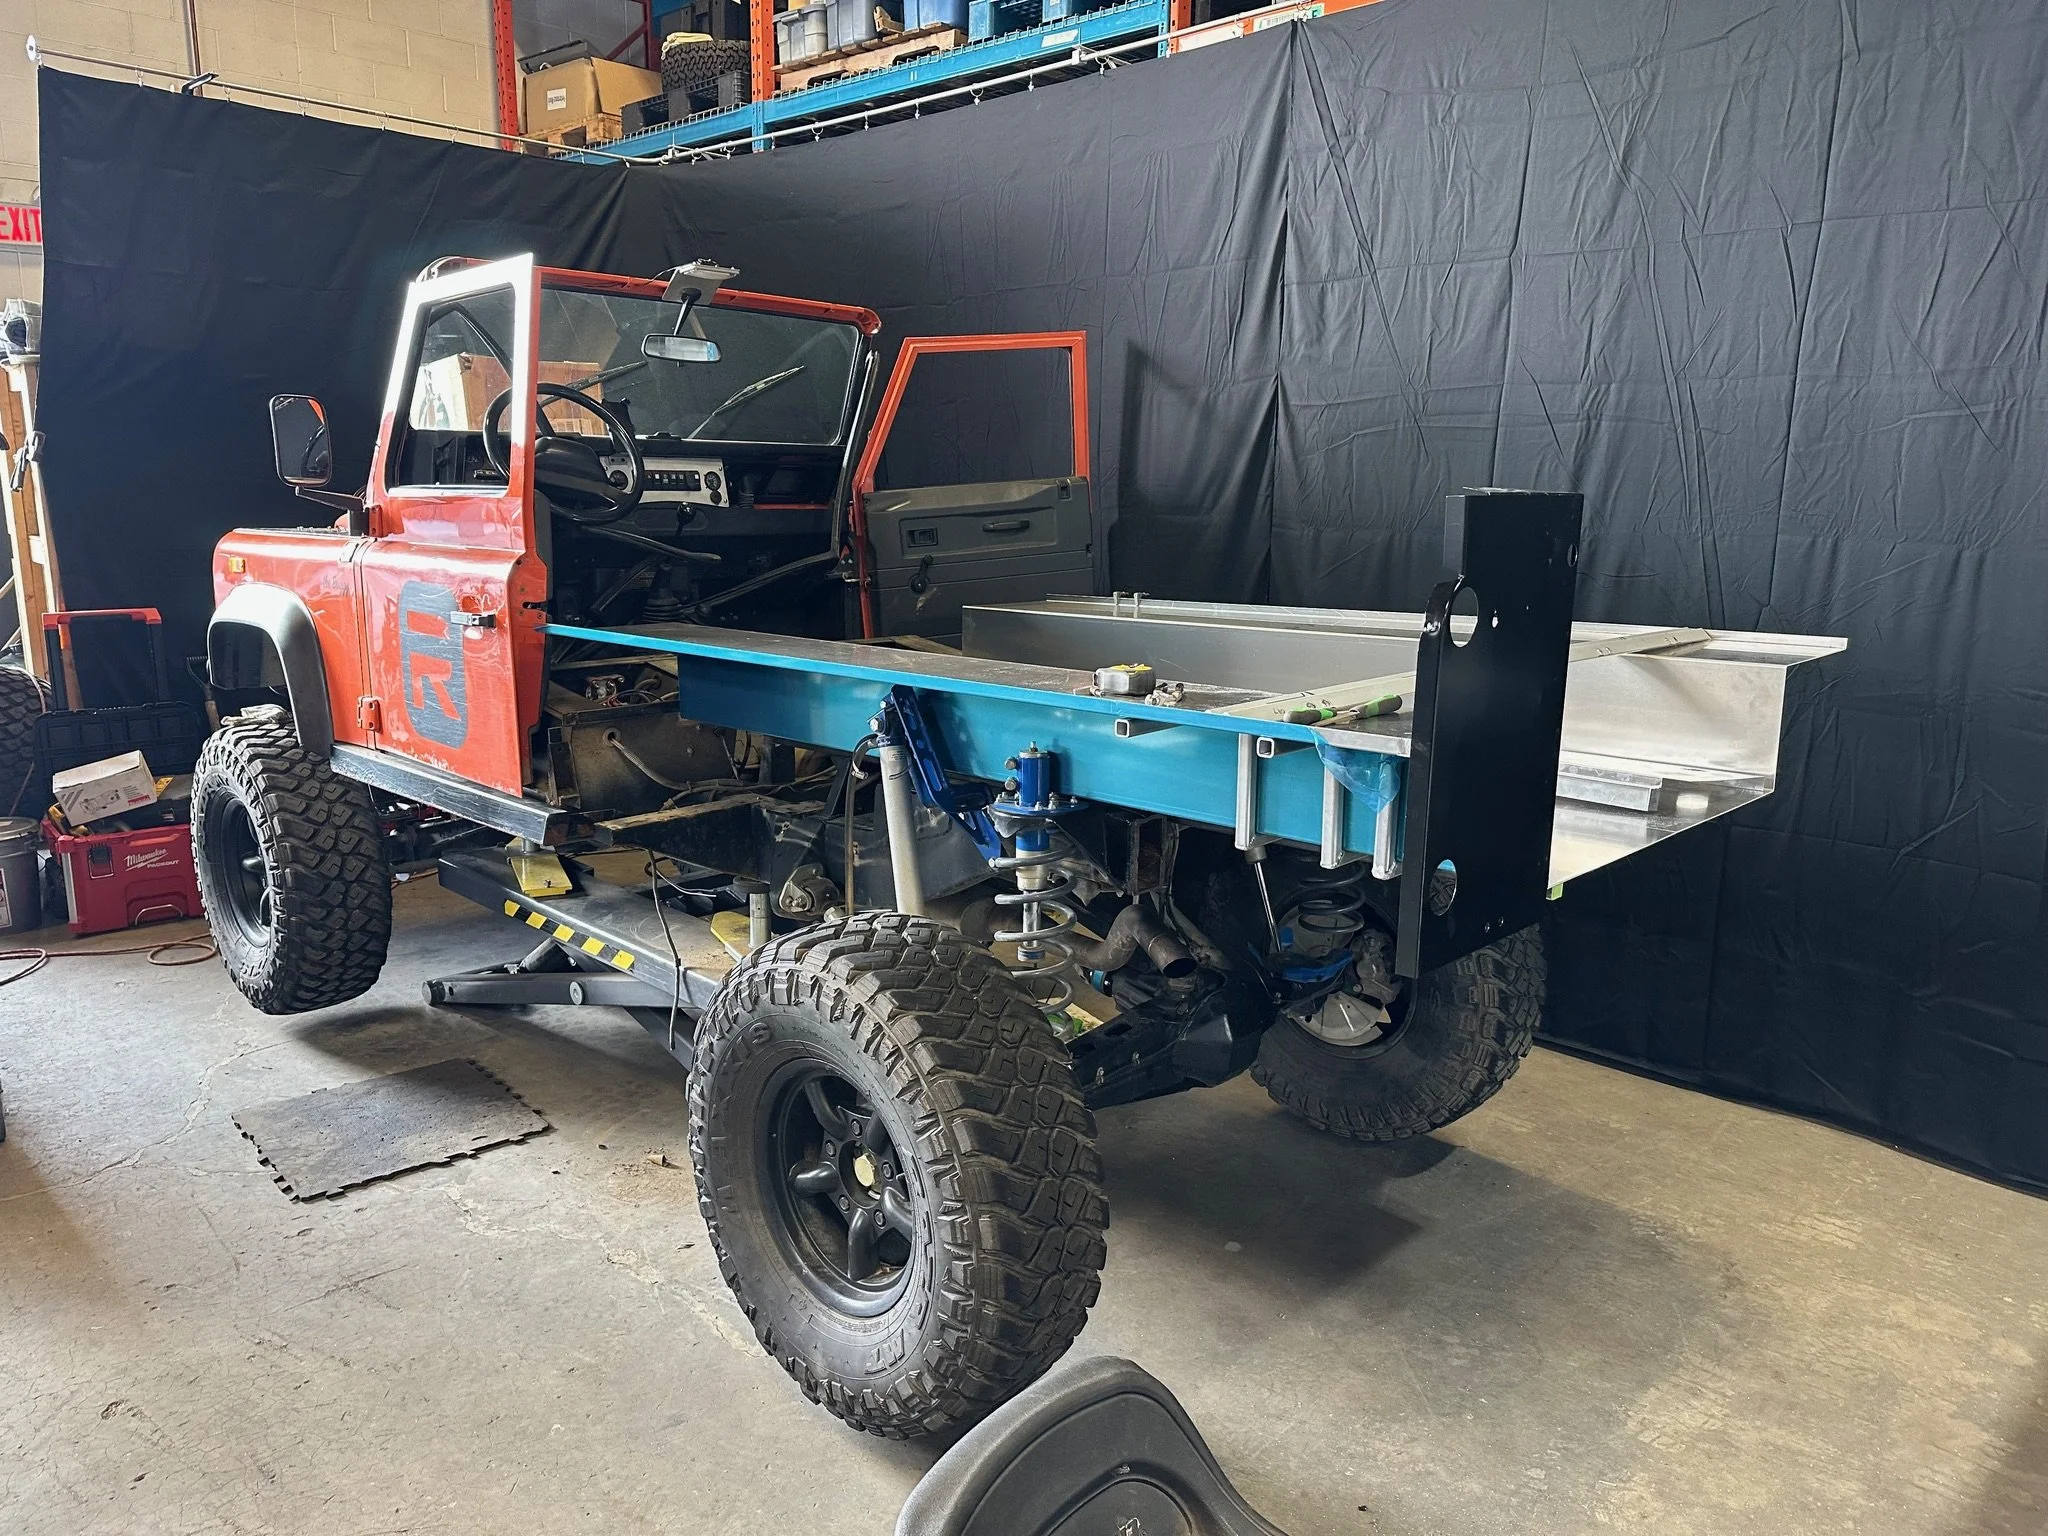
While the tub was exciting to see come together, the chassis was difficult to figure out. We basically had the tub floating in the air and not much of the original chassis to reference off. We spent a lot of time measuring, re-measuring and straightening the front half of the bodywork and bulkhead to make sure everything was properly square and true. In the end we based the chassis off the tub position and the door gaps, which was kind of backwards. This was way more time consuming than I’d planned, but it allowed for a few custom Buggy modifications including the extra 2-½” inches of clearance at the rear crossmember. We used 3/16” steel plate cut on our Arcdroid CNC Plasma cutting table and a 4x4 square tube for the rear crossmember. It’s a bit overkill, but that’s how we roll. We added the jack point tubes and the tapered ends to the rear crossmember to match the style of a factory crossmember.


Upper Side Panels
We still needed some 110 or 109” 2-door rear upper side panels. I posted on some forums to try and find a pair of factory panels to work with but never found anything. I decided I would just make my own, seemed simple enough, right! When I got stuck with the tub, I started cutting and prepping the materials for the upper side panels. I decided to go with 0.080” aluminum which is thicker than the factory material but not as heavy as the material we used for the tub. Welding the thinner metal meant there was a lot more heat distortion and warping. This was rather frustrating, but we made it work in the end.


Taildoor
It wasn’t top of mind in the beginning, but eventually I realized we’d need a rear taildoor. I figured I could make one, but I was advised that I already had taken on too much. So, we ordered an OE version of the original Puma Defender taildoor from the UK. We had to trim the bottom to fit the tub, which had less room with the raised rear crossmember.


New Fuel Tanks
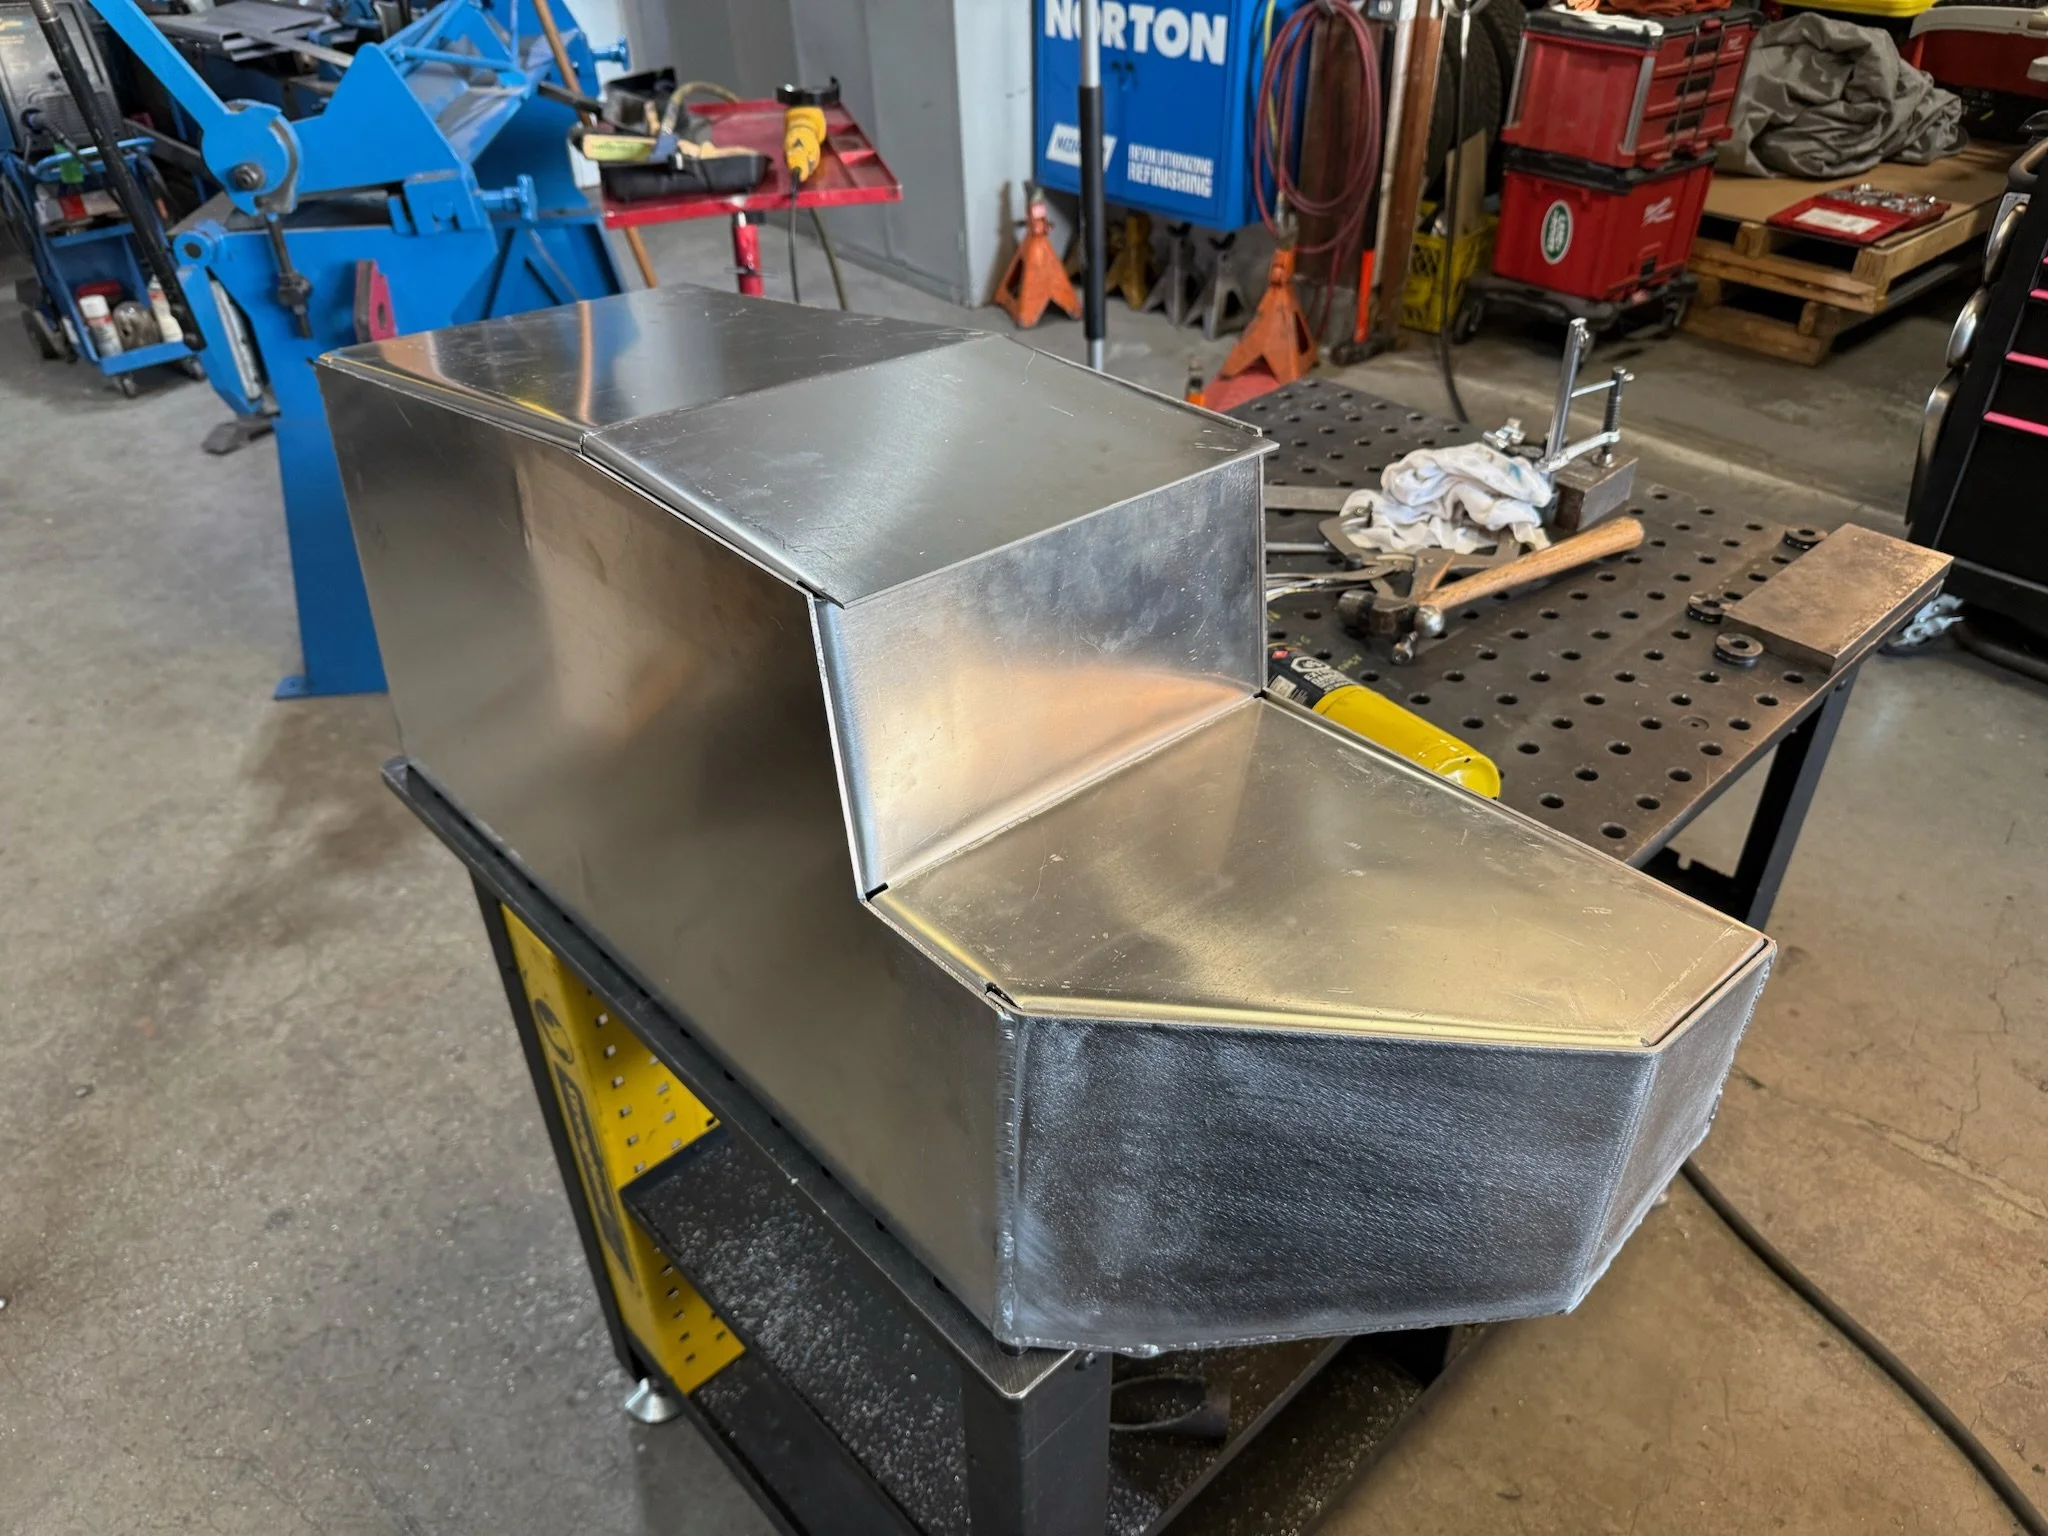
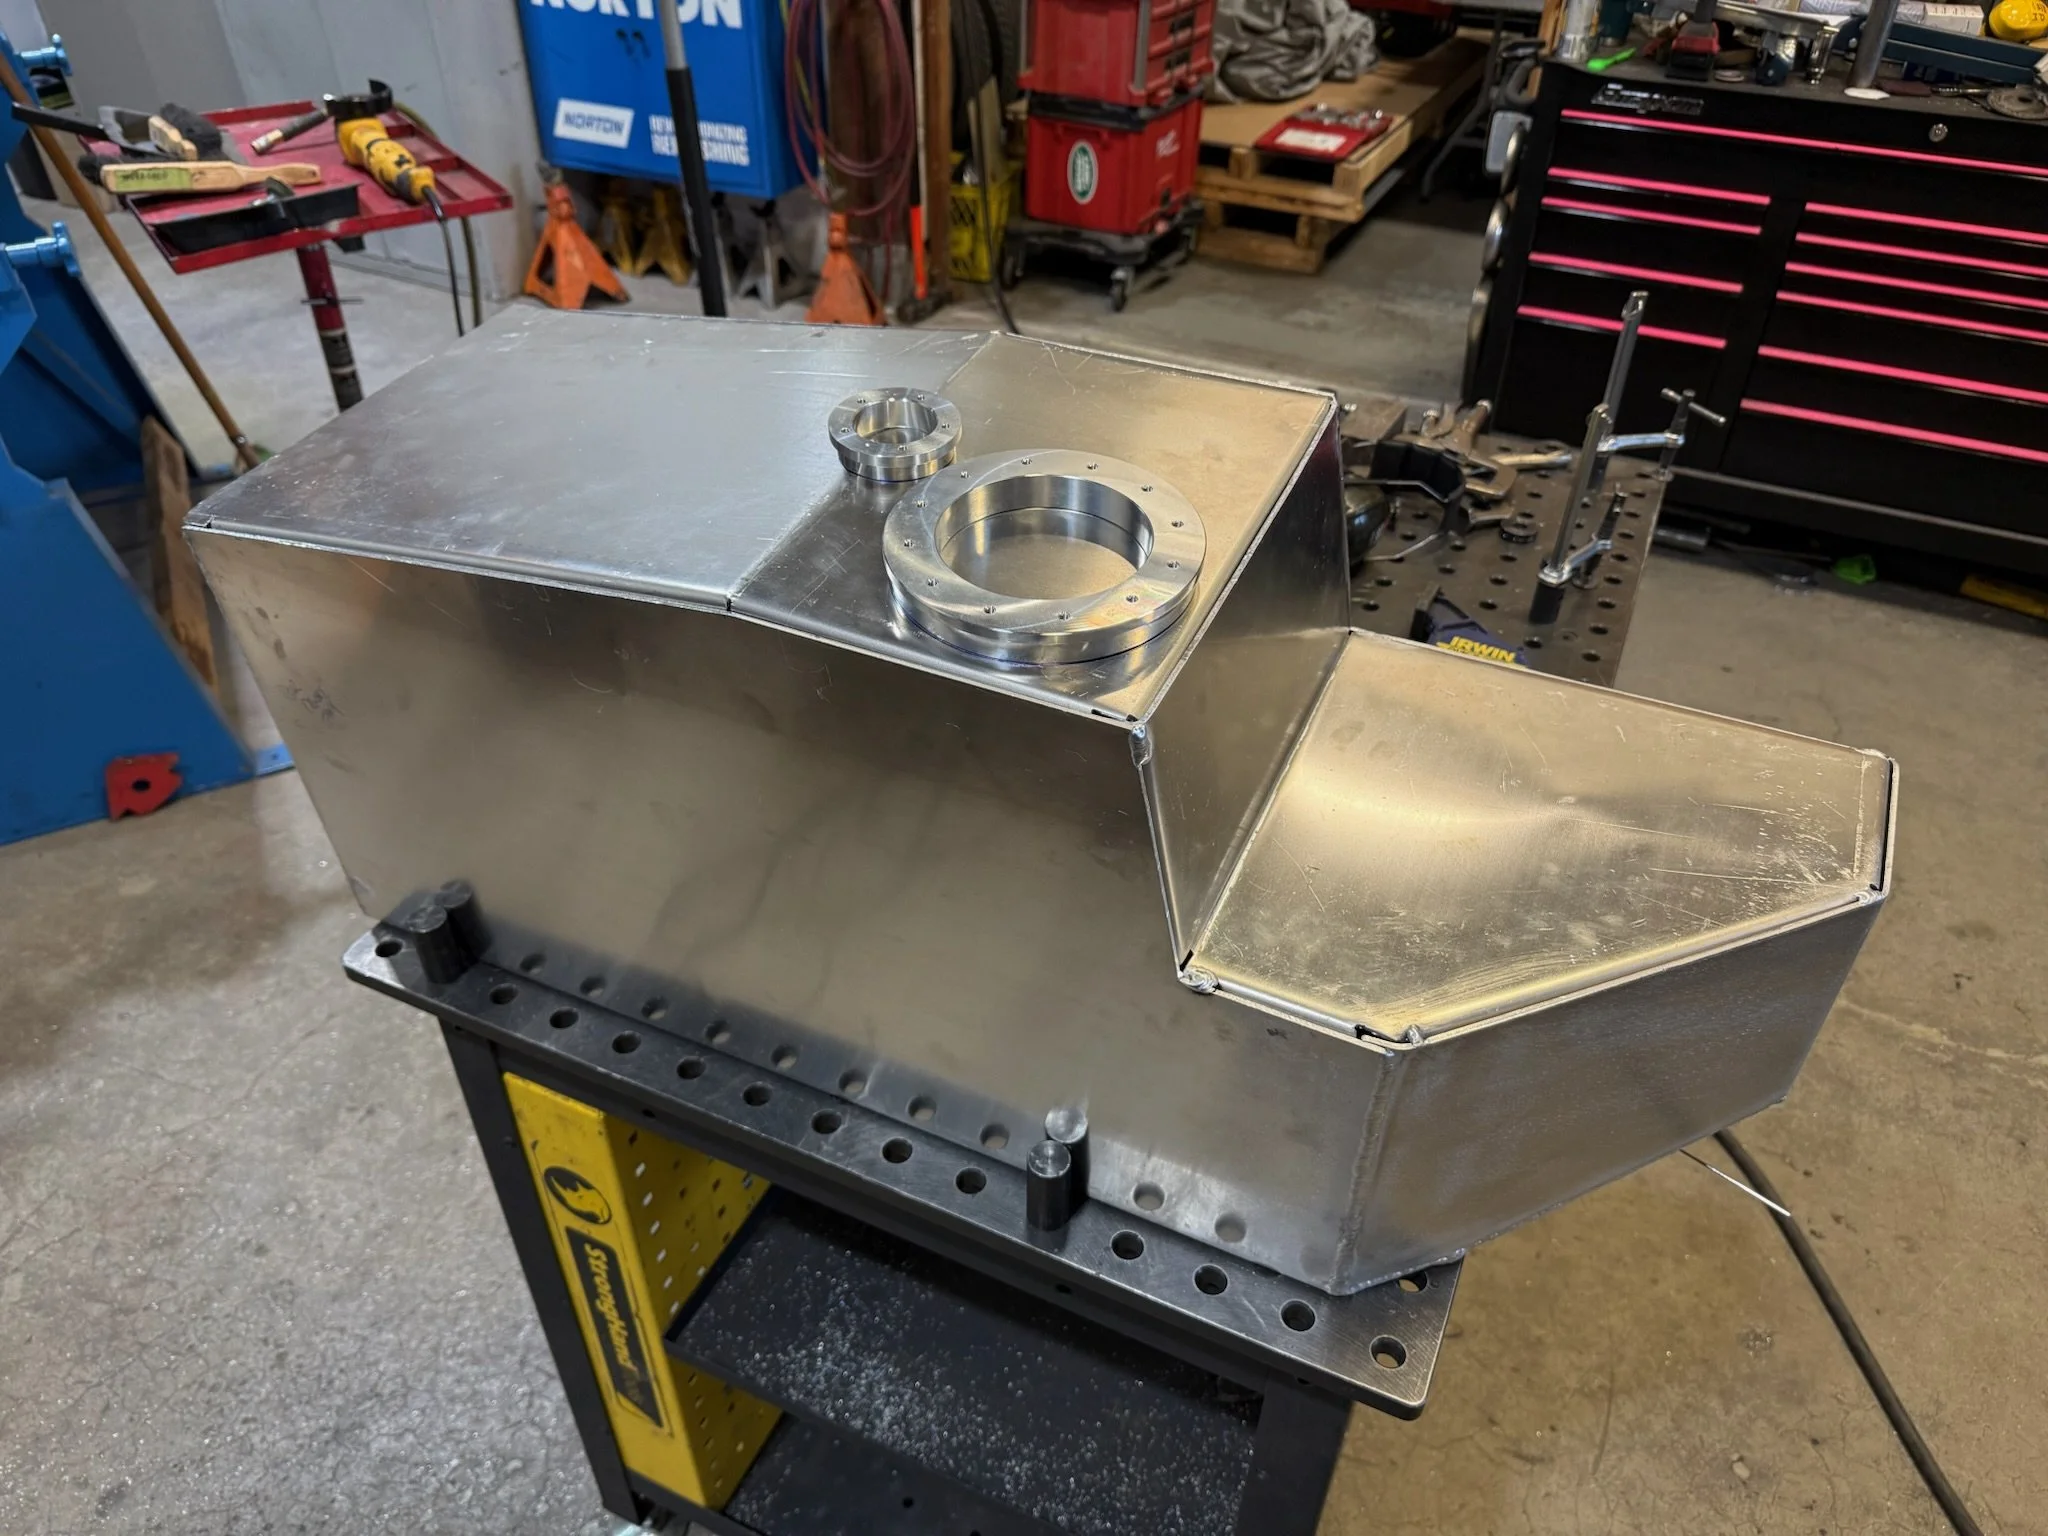
As things were progressing and time was getting on, there was still a big elephant in the room: I didn’t have a fuel tank! The old tank was mounted on top of the chassis where the tub now sat. I planned to end up with two saddle tanks, under the front seats like the older Defenders and Series trucks. My goal was to end up with a range of about 1000km on a fill while maintaining good clearance and off-road capability. With an anticipated 12 liters per 100km fuel economy I would need about 120 liters, which is A LOT!! I decided to build my own custom aluminum fuel tanks with a sloped bottom for off-road clearance but also maximize the space under the seat and front floor boards. I built a wood template for test fitting and then started bending up ⅛” aluminum sheet metal. This turned into another pretty major project within the project. There was a lot of Aluminum TIG welding and, thanks to the tub project, my welding was getting a little better. So I went for it! In the end I had two fuel tanks with a combined volume of 130 to 140 liters. WOW! I did not expect that. They didn’t leak either!
Roll Cage
I wanted to retain some of the Buggy’s original rollcage which provided some safety and protection. With the extra weight of the AluCab up top, I also wanted more strength and rigidity. I kept the hoop around the windscreen and cut off the rest of the previous Buggy cage. With the Alucab test fitted we built an internal roll bar based on the NAS Defenders. We added brackets to mount to the tub capping, upper body panel, seat belt mount and a bracket to bolt through the side of the Alucab for an external tree protection bar down the entire side of the roof. This was something my son Pieter took the lead on and after a few attempts and using the tube bending software we had a perfect fit!


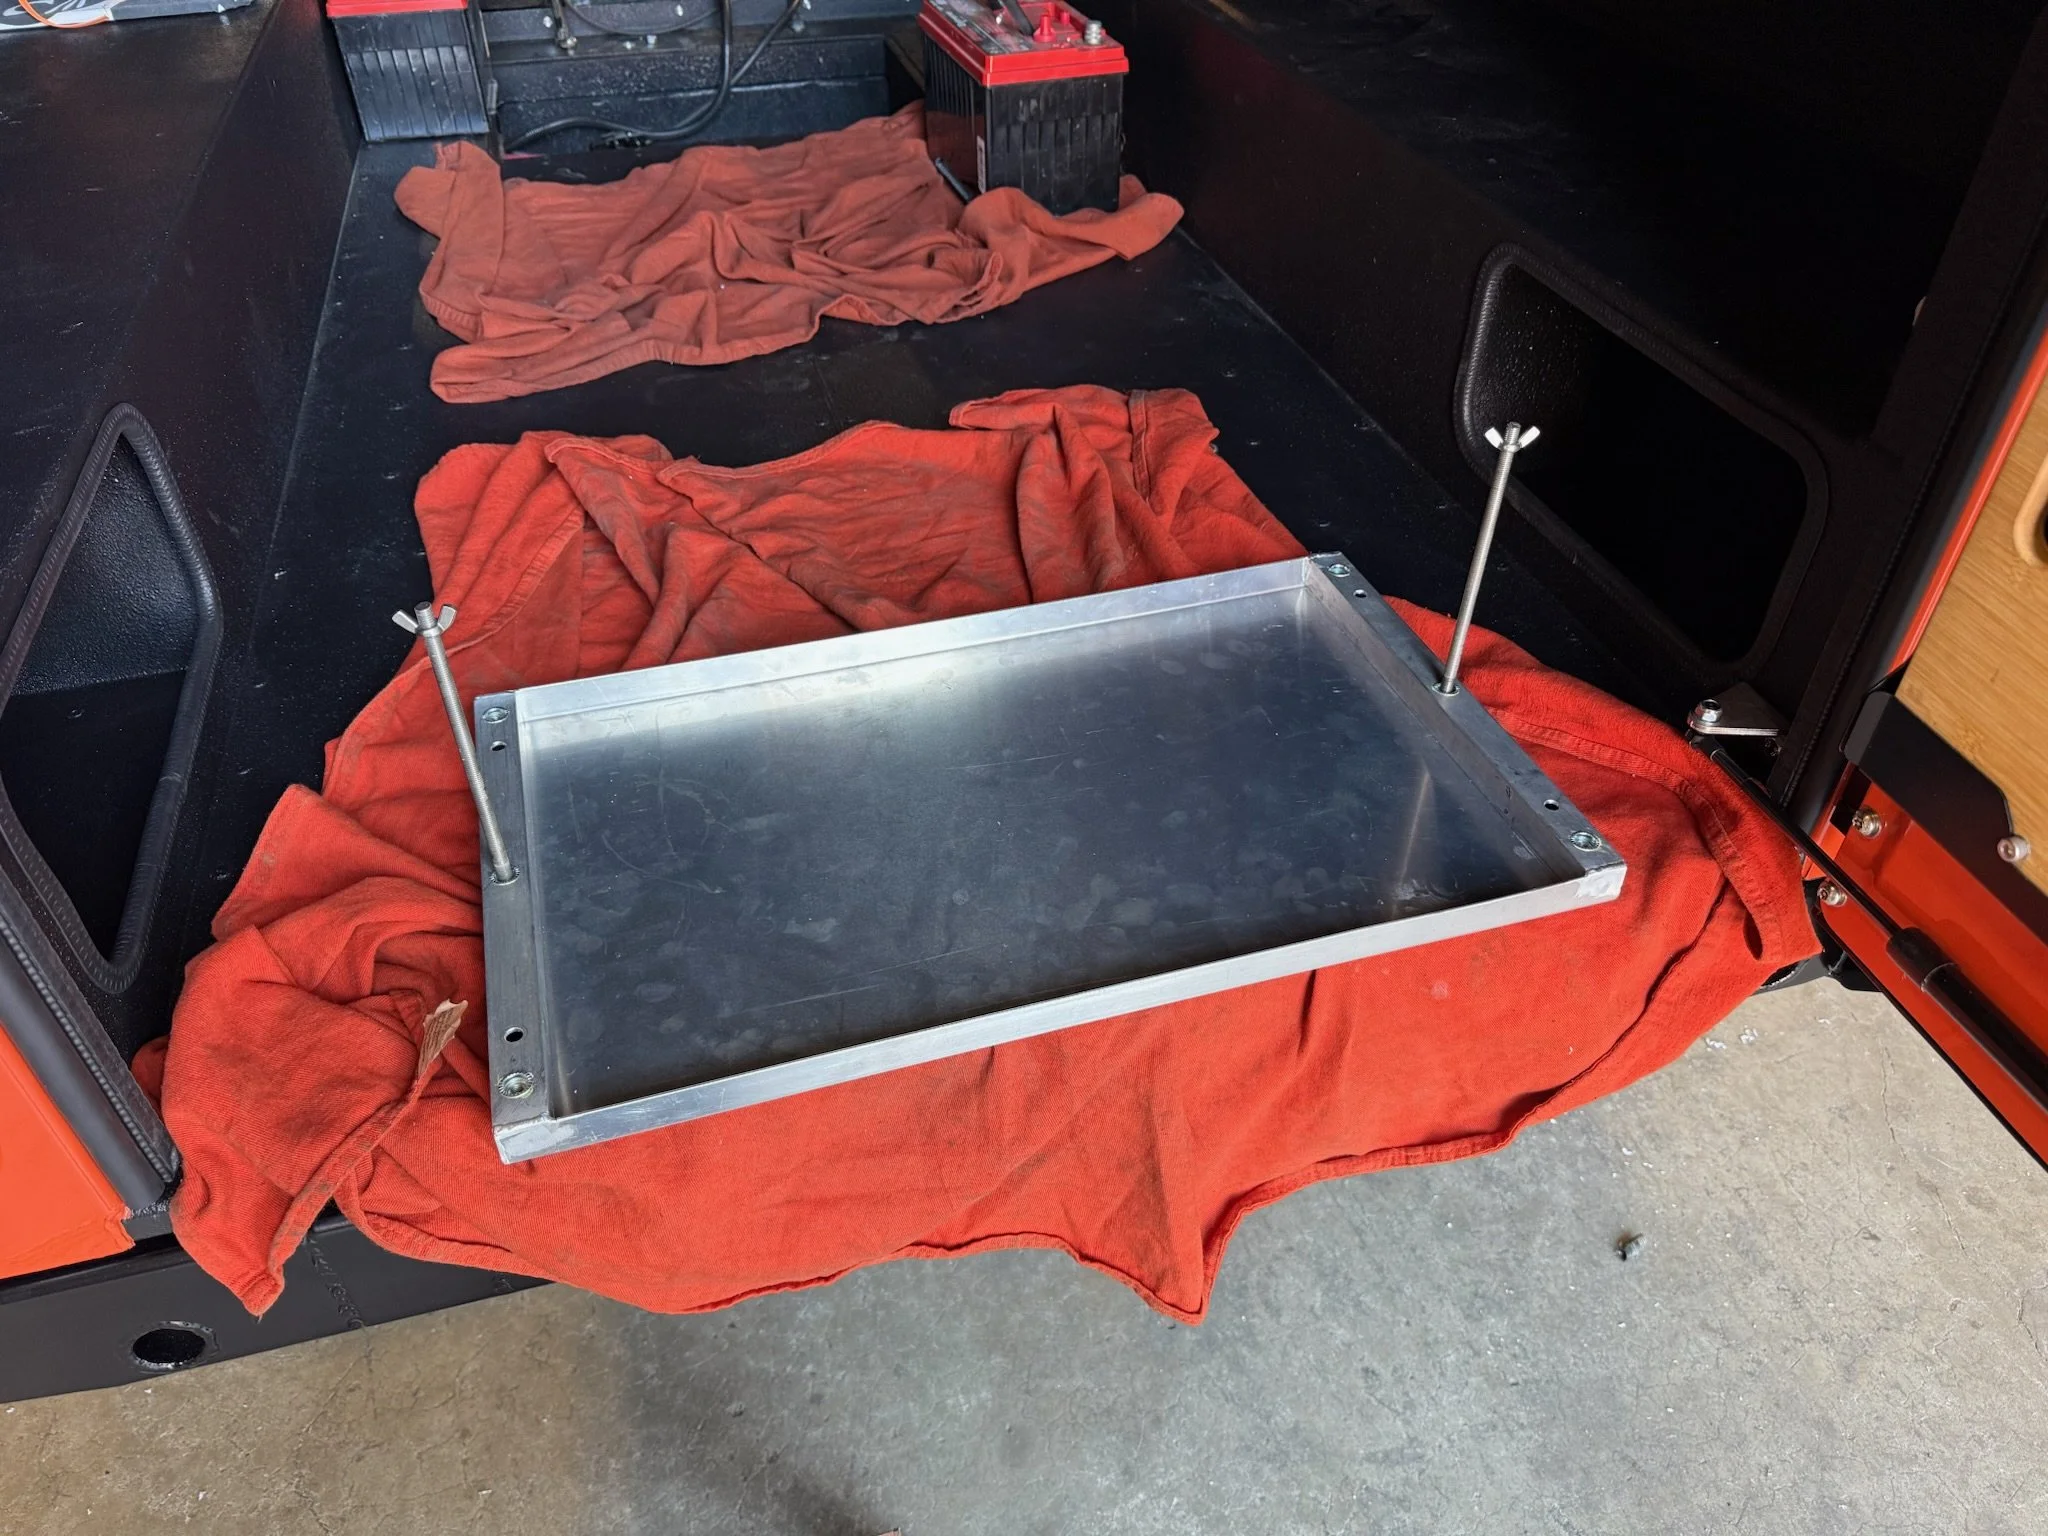
Battery Box relocate
With the fuel tanks under the seats, I needed a home for the batteries. This was the last major design and fabrication project.

Stay tuned to hear more about the build - and about our epic road to the arctic!
